
Get a step-by-step guide to installing a concrete patio, ensuring durability, low maintenance, and a polished finish.
A concrete patio adds a durable, low-maintenance space for outdoor living. With the right planning and execution, it can last for decades with minimal upkeep.
Whether you’re tackling the project yourself or hiring a concrete patio contractor, proper site prep, reinforcement, and finishing are key to a strong, crack-resistant surface. (1)
Key Takeaways
- Proper Base Preparation Prevents Cracking: A solid gravel base and compacted soil ensure longevity.
- Reinforcement & Finishing Matter: Rebar, wire mesh, and surface sealing add strength and enhance aesthetics.
- DIY vs. Hiring a Pro: Weigh the costs, effort, and expertise needed to decide the best approach.
Benefits of a Concrete Patio
Credits: DIY Concrete Patio
A concrete patio is a smart choice for homeowners who want a durable, low-maintenance, and affordable outdoor space.
Unlike wood, which can rot, or pavers, which shift over time, concrete stays strong for decades with minimal care. It also offers many design options, making it easy to match different styles and needs.
Durability: Built to Last
Concrete is one of the strongest materials for patios. It holds up against harsh weather, heavy furniture, and frequent foot traffic without breaking down. Unlike wood, it won’t rot or attract pests like termites. It also resists moisture, preventing mold and mildew growth.
- Withstands extreme temperatures – Doesn’t warp or crack easily from heat or cold.
- No risk of shifting – Unlike pavers, which can move over time.
- Handles weight well – Can support grills, outdoor furniture, and hot tubs without sinking.
When properly installed and sealed, a concrete patio can last 30+ years with little maintenance.
Customization: Endless Design Possibilities
Concrete might sound plain, but it offers many ways to customize its appearance. Homeowners can choose from different textures, colors, and patterns to match their outdoor space.
- Stamped concrete – Mimics brick, stone, or tile for a high-end look.
- Stained concrete – Adds color for a modern or rustic style.
- Exposed aggregate – Reveals decorative stones for a unique texture.
Edges can also be rounded or beveled for a softer look. These options make concrete a versatile choice that works with any landscape design.
Low Maintenance: Easy to Care For
Unlike wood, which needs staining and sealing every year, concrete is nearly maintenance-free. A sealed patio only needs occasional cleaning to stay in good shape.
- Sweep or rinse regularly – Removes dirt and debris.
- Seal every 2–3 years – Protects from stains and moisture damage.
- Fix small cracks early – Prevents larger problems over time.
With these simple steps, a concrete patio stays clean and durable without much effort.
Cost-Effective: More Affordable Than Other Materials
Concrete is one of the most budget-friendly patio materials, especially compared to natural stone or high-end pavers. The average cost of a basic concrete patio is around $6–$15 per square foot, depending on the finish and labor costs.
- Plain concrete – Most affordable option, starting at $6 per square foot.
- Stamped or stained concrete – Costs more but still cheaper than stone or brick.
- Long lifespan – Lasts twice as long as wood decks, saving money on replacements.
Because concrete is so durable, it also saves money on long-term repairs and maintenance. For homeowners looking for style and function at a lower price, a concrete patio is a great investment.
Planning & Design Considerations
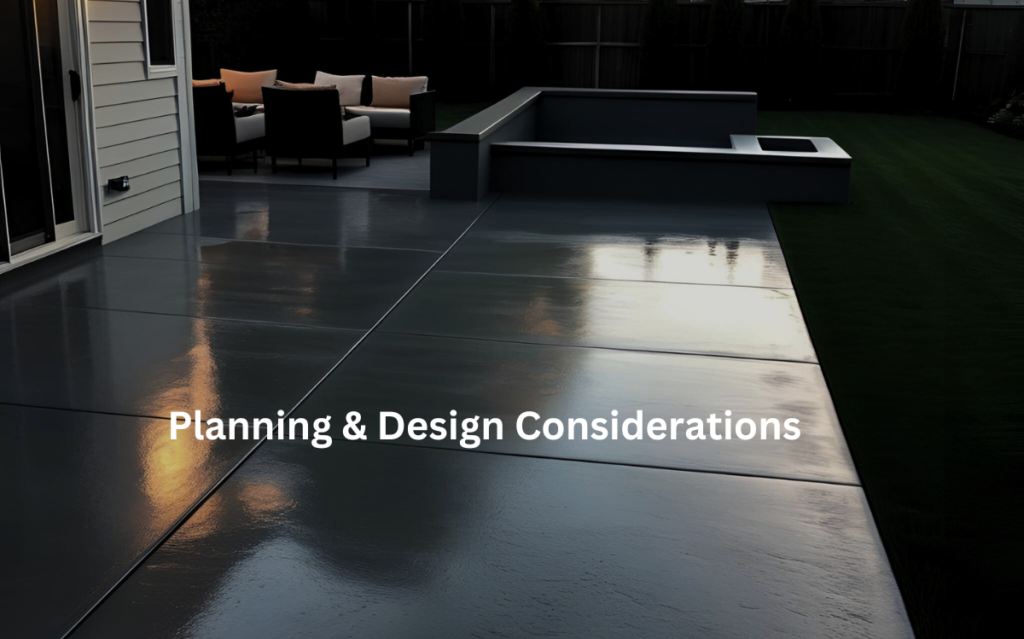
Before starting a concrete patio, careful planning helps avoid drainage problems, uneven surfaces, and unnecessary costs. The right design ensures the patio is both functional and visually appealing, fitting the available space while allowing for future use. (2)
Choosing the Best Location
Placement is more than just picking a flat spot. A patio should fit naturally within the yard’s layout while considering shade, sunlight, and access to the house.
A spot with too much direct sun can get uncomfortably hot, while one with too much shade might feel damp. Drainage is another key factor—rainwater should flow away from the house, not pool around the foundation.
Determining the Right Size & Shape
Size depends on how the patio will be used. A 12×12-foot space works well for a small seating area, but a patio for dining or entertaining should be larger. Custom shapes, such as curves or multi-level designs, can create a more unique look. The key is ensuring enough room for movement while keeping proportions balanced with the yard.
Checking Permit Requirements
Some areas require a permit for patios over a certain size, especially if they are attached to the house or built on a slope. Local building codes may also have rules about how close a patio can be to property lines. Checking with the local permit office before starting prevents future headaches, like fines or forced modifications.
Deciding Between DIY or Hiring a Contractor
Pouring concrete might seem simple, but getting a smooth, level, and durable finish takes skill. DIY installation saves money, but mistakes can lead to costly repairs.
A professional contractor ensures the patio is properly reinforced, leveled, and finished, which can extend its lifespan. For larger or more complex designs, hiring a contractor may be the best option.
Site Preparation & Base Installation
A concrete patio is only as strong as its foundation. Skipping steps during site preparation can cause cracks, sinking, or water damage later. Taking the time to build a solid base ensures the patio stays level and lasts for years.
Clearing the Area
The first step is to remove everything in the patio space, including grass, rocks, roots, and debris. This prevents organic material from breaking down under the concrete, which could cause sinking. Marking the patio’s outline with stakes and string helps define the space before digging.
Excavation and Soil Compaction
Digging down 6–8 inches creates enough space for the concrete slab and base material. The depth depends on the patio’s intended use—a simple sitting area requires less depth than a driveway or heavy load-bearing surface. Once the soil is exposed, compacting it with a tamper or plate compactor prevents future settling, which could lead to uneven surfaces.
Laying the Gravel Base
A 4-inch layer of crushed gravel adds stability and improves drainage. Without a proper base, water can get trapped under the concrete, leading to cracks over time. The gravel should be spread evenly and compacted in layers to create a firm foundation. For patios in areas with heavy rainfall or clay soil, adding a slight slope helps direct water away from the house.
A well-prepared site prevents long-term problems, ensuring the patio remains level, strong, and resistant to damage.
Building the Formwork & Reinforcement
Once the site is prepared, formwork holds the concrete in place while it sets. Reinforcement strengthens the slab, reducing the chances of cracks over time. Skipping these steps can lead to uneven edges, shifting, or structural weaknesses.
Setting Up the Formwork
Formwork creates a barrier that contains the wet concrete. Most homeowners use 2×4-inch wooden boards, but metal or plastic forms are also options. The boards should be secured with wooden or metal stakes every 2–3 feet to keep them from shifting under pressure.
For patios with curves, flexible plastic forms or thin plywood work better. Before moving forward, checking that all corners are square and the height is level ensures a smooth and even slab.
Ensuring Leveling & Proper Alignment
A patio that isn’t level can cause drainage problems or make furniture unstable. Using a string line stretched across the formwork helps check for high or low spots. If the ground is uneven, adjusting the forms by adding or removing soil underneath them can fix the issue. Once everything looks right, reinforcing the forms with extra stakes prevents movement when the concrete is poured.
Adding Rebar or Wire Mesh for Strength
Without reinforcement, concrete can develop cracks over time. The best option depends on the patio size and expected use. Rebar (⅜-inch or ½-inch diameter) should be spaced 18 inches apart, creating a grid for extra strength.
Wire mesh is another alternative, especially for patios with lighter loads. The key is ensuring that reinforcement sits in the middle of the slab thickness, not directly on the gravel base, so it properly strengthens the concrete. Small plastic or metal supports called rebar chairs can help keep it at the right height.
Mixing, Pouring & Leveling Concrete
Once the formwork is ready, the next step is mixing and pouring concrete. This process must be done quickly and evenly, as concrete starts setting within 30–60 minutes. Poor mixing or rushed leveling can lead to weak spots, air pockets, or an uneven finish.
Mixing Concrete: Choosing the Right Method
For large patios, ordering ready-mix concrete from a truck ensures consistency and saves time. A small 10×10 patio typically requires 1.5 cubic yards of concrete. For DIY projects, bagged concrete mix can be used with a mixer or wheelbarrow. A 10×10 patio needs around 50–60 bags of 80-lb concrete mix. The goal is a thick, pourable consistency—not too watery or dry.
Pouring the Concrete Evenly
Pouring should start from one side and move across the patio in sections, preventing air pockets. Using a shovel or rake to spread the concrete evenly helps avoid weak spots. It’s important to pour continuously without long pauses to prevent cold joints (gaps between sections that don’t bond properly).
Screeding & Floating for a Smooth Surface
Right after pouring, a 2×4 screed board should be dragged across the top to level the surface. This removes excess concrete and fills in low spots.
After screeding, a bull float smooths the surface while pushing larger aggregates down. If finishing is rushed, the slab may end up uneven or with weak edges. Taking time to get it right ensures a solid, professional-looking patio.
Finishing Techniques & Decorative Options
Once the concrete is poured and leveled, finishing techniques enhance both appearance and functionality. A well-finished patio can mimic high-end materials, improve durability, and increase slip resistance. Choosing the right finish depends on style preferences and how the space will be used.
Creating Texture for Safety & Aesthetics
A smooth concrete surface may look sleek, but it can be slippery when wet. A broom finish is one of the simplest ways to add traction. By dragging a stiff-bristle broom over the surface before the concrete fully sets, fine grooves are created to improve grip.
For a more decorative look, stamping is a popular option. Stamped concrete uses textured mats to imprint patterns that resemble stone, brick, or wood. If a subtle texture is preferred, a salt finish—where rock salt is pressed into the wet surface and later washed away—creates small indentations for a natural look.
Coloring Techniques for Customization
Adding color to concrete prevents a dull, gray appearance. Integral color is mixed directly into the wet concrete before pouring, ensuring even pigmentation throughout the slab. This method is fade-resistant and ideal for long-term durability.
Surface-applied options like stains and dyes offer more customization. Acid stains react chemically with the concrete, creating varied, earth-toned shades, while water-based dyes provide a broader color range. Stains and dyes require sealing to lock in color and prevent fading.
Edge Treatments for a Polished Look
The edges of a patio affect both its appearance and durability. Sharp edges are prone to chipping, especially in high-traffic areas. Rounding or beveling the edges creates a softer, more refined finish.
For a custom touch, saw-cut or decorative edge forms can be used to give the patio a more intricate border design. Edge treatments are a small detail but contribute to the overall polished look of the patio.
Curing, Sealing & Maintenance
Concrete may seem solid right away, but it takes time to fully strengthen. Proper curing, sealing, and ongoing maintenance prevent cracks, stains, and weather-related damage. Without these steps, the surface can deteriorate faster than expected.
The Importance of Proper Curing
Curing is the process of keeping concrete moist and temperature-controlled while it hardens. Without curing, the surface may dry too fast, leading to cracks and weak spots. The best method is covering the patio with plastic sheeting or a curing blanket for at least seven days.
Another option is misting the surface with water several times a day. If temperatures are too hot or too cold, curing time may need to be adjusted for best results.
Sealing to Protect Against Damage
Sealing concrete adds a protective barrier against moisture, stains, and UV exposure. Without a sealer, water can seep into the surface, causing cracks or discoloration over time. Some sealers provide a natural, matte look, while others enhance color with a glossy finish.
Solvent-based sealers tend to bring out richer tones, while water-based options offer a more subtle effect. A patio should be sealed after the first 30 days of curing and then resealed every two to three years for continued protection.
Routine Maintenance for Long-Lasting Durability
Keeping a concrete patio in top shape requires minimal but regular upkeep. Sweeping away debris prevents dirt buildup and reduces the risk of stains. Spills should be cleaned quickly using mild detergent and water.
Harsh chemicals or de-icing salts should be avoided, as they can break down the sealer and weaken the concrete over time. If cracks appear, repairing them early prevents further damage. With proper care, a concrete patio can stay strong and visually appealing for decades.
Hiring the Right Concrete Contractor
Hiring a professional contractor ensures that a concrete patio is installed correctly, lasts for years, and looks the way it should. A poorly done job can lead to cracks, drainage issues, or uneven surfaces. Choosing the right contractor requires research, comparing options, and watching for warning signs.
How to Find a Reliable Contractor
Start by looking for licensed and insured contractors with experience in patio installations. Checking online reviews, asking for references, and looking at past projects can help determine the quality of their work. Friends, neighbors, or local hardware stores may also have recommendations. A trustworthy contractor will explain the process clearly, provide a detailed estimate, and answer any questions.
Comparing Estimates for the Best Deal
It’s best to get at least three quotes before making a decision. Each estimate should include material costs, labor, and the expected completion time. Be wary of extremely low bids, as they may indicate poor materials or rushed work. A detailed, written contract ensures there are no surprises during or after the job.
Red Flags to Watch For
Scams and unreliable contractors are common in the construction industry. Warning signs include contractors asking for large upfront payments, refusing to provide written agreements, or using high-pressure sales tactics.
Cash-only deals should also be avoided, as they leave no paper trail for disputes. Hiring a reputable professional ensures the patio is built to last without costly repairs down the road.
Final Thoughts
A concrete patio is one of the best investments you can make for your outdoor space—durable, customizable, and built to last.
At Lapis Patios, we specialize in creating high-quality patios that enhance both functionality and style. Whether you’re considering a DIY project or looking for a trusted concrete contractor, following the right steps ensures a flawless finish.
Ready to transform your backyard into a luxurious outdoor retreat? Contact Lapis Patios today for a free consultation, and let our experts bring your vision to life with precision, quality, and craftsmanship!
FAQ
How can I prevent my concrete patio from cracking over time?
Concrete is strong, but it’s not invincible. Without proper preparation, cracks can form due to soil movement, temperature changes, or moisture issues.
A solid base is the first defense—start with at least 4 inches of compacted gravel to support the slab. Reinforcement helps, too—wire mesh or rebar adds strength and prevents large cracks.
Control joints, spaced every 4 to 6 feet, allow concrete to expand and contract naturally. Lastly, curing is critical. Keeping the surface moist for at least a week prevents rapid drying, which can cause shrinkage cracks. A quality sealer also protects against moisture damage.
Can I install a concrete patio over an existing slab?
Yes, but it’s not always the best idea. Pouring new concrete over old can save time and money, but the existing slab must be stable. If it has cracks, uneven sections, or poor drainage, those issues will transfer to the new surface. To ensure proper bonding, roughen the old slab and apply a bonding agent before pouring the new layer. H
owever, keep in mind that adding another layer increases the overall height, which can affect door clearances, steps, or drainage. In many cases, removing the old slab and starting fresh is a better long-term solution.
What is the best time of year to install a concrete patio?
Spring and early fall are ideal for concrete patio installation. Moderate temperatures between 50 and 70 degrees Fahrenheit allow concrete to cure properly without drying too fast or freezing.
Summer can work, but high heat causes rapid moisture loss, leading to surface cracks. If pouring in hot weather, mist the surface regularly and cover it with plastic to slow evaporation.
Winter installations are tricky, as freezing temperatures can weaken the concrete. If necessary, use insulating blankets or heated enclosures to keep the curing process stable. Timing it right ensures a durable and long-lasting patio.
How do I ensure my concrete patio drains properly?
Proper drainage prevents water from pooling, which can lead to cracks, erosion, and mildew growth. The key is to create a slight slope, about 1/8 inch per foot, directing water away from the house or any structures. A well-compacted gravel base also improves drainage by preventing water from getting trapped under the slab.
Expansion joints and proper sealing help reduce water damage over time. If your yard has poor natural drainage, consider adding a French drain or weep holes at the patio’s edge to channel excess water away from the surface.
Can I add patterns and colors to my concrete patio after installation?
Yes, but the timing and method matter. If you want color throughout the concrete, integral color should be mixed in before pouring. If you prefer surface color, stains and dyes can be applied after the concrete cures.
For patterns, stamped concrete is best done while the concrete is still wet, using textured mats to create stone, brick, or tile effects. If your patio is already hardened, resurfacing with a decorative overlay can add texture and patterns. Proper sealing enhances the color and protects it from fading, stains, and weather damage over time.
References
- https://www.masterclass.com/articles/diy-concrete-patio-guide
- https://www.wikihow.com/Pour-a-Concrete-Patio