Gravel patio installation is the perfect weekend project for any homeowner—get step-by-step tips to create a relaxing, easy-care outdoor retreat today.
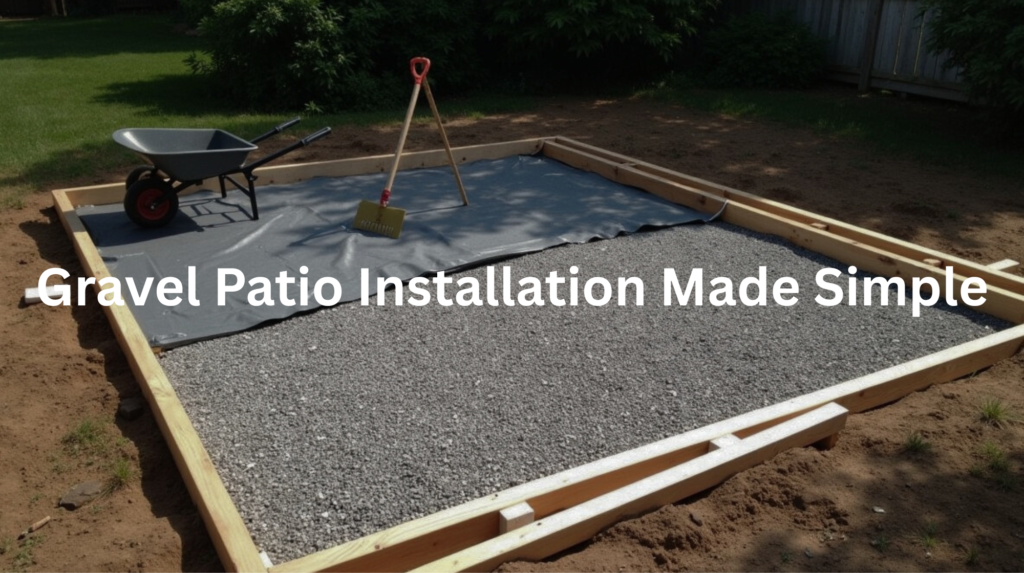
The crunch of gravel underfoot transforms Charlotte backyards into low-maintenance retreats. A well-built gravel patio costs 60% less than concrete slabs and takes just 2-3 days to install. The process starts with excavating 4-6 inches deep, laying landscape fabric (prevents weeds), adding a base layer of crushed stone, then topping with decorative gravel.
Local favorites include river rock and crushed granite, both standing up to Carolina’s summer storms. The key? Proper drainage and edging. Without these, you’ll end up with a muddy mess after the first rain.
Want to learn the exact steps for a pro-level gravel patio installation? Keep reading.
Key Takeaway
- Gravel patios are cost-effective and quick to install.
- Proper preparation and material selection are crucial for stability.
- Regular maintenance will enhance the longevity and appearance of your patio.
Planning and Preparation
Choosing the Right Location
Selecting the right spot for a gravel patio is crucial. Imagine standing in your backyard. You can feel the warmth of the sun on your skin. A flat, well-drained area is best. It’s easier to work with. Plus, good drainage keeps the patio from turning into a puddle after rain. A slight slope away from the house is ideal. This helps water flow away.
Sunlight also matters. Think about how you’ll use the patio. If it’s for afternoon barbecues, you want a spot with shade in the hot months. And if morning coffee is your thing, some sun might be welcome. Checking the proximity to your home is key, too. You want it close enough for easy access, but not too close that it feels cramped.
What’s great about gravel patios is their excellent permeability. Unlike concrete or stone patios that create runoff issues, gravel allows rainwater to drain freely through the surface. This makes them an environmentally friendly choice with a lower carbon footprint than concrete alternatives.
Overall, the perfect location blends function with comfort. It’s a space where you can enjoy family time or simply relax with a book.
Design and Layout
Now that you’ve picked the location, it’s time to design. Outlining the shape of your patio is fun. You can use stakes and string or marking paint. Picture a garden hose—it’s flexible and lets you create curves or straight lines. This is your chance to get creative.
Measuring accurately is important. You don’t want to run out of materials halfway through. For example, if your patio is 20 by 20 feet and you want it three inches deep, you’ll need about 3.7 cubic yards of gravel.
One of the biggest advantages of gravel is its design flexibility. It comes in a wide range of colors and sizes, giving you tons of options for both modern and traditional garden styles. This variety lets you create a patio that perfectly complements your home’s aesthetic.
Visualizing the layout helps, too. Is it a cozy nook for two chairs and a small table? Or a large space for outdoor dining with friends? This exercise sets the stage for your gravel patio adventure.
Tools and Materials Needed
Essential Tools
Before you get started, gather your tools. You’ll need a shovel for digging and moving dirt. A rake will help level the area. And a wheelbarrow is necessary for transporting gravel.
Don’t forget the tamper or plate compactor. This tool compresses the gravel for stability. A measuring tape and level will help ensure everything is even. You might also need stakes and string for marking your area accurately.
These tools are your companions on this journey. They’ll help you shape your vision into reality. And while it may feel like a lot to gather at first, each tool has its purpose.
Materials Required
Materials are just as important as tools. First, you’ll need crushed stone for the base layer. This provides stability and helps with drainage. For the surface, you’ll want decorative gravel in sizes between 4-14mm, which is optimal for stability and compaction, especially if you’re using gravel grids.
Landscape fabric is crucial, too. This fabric goes between the base layer and the gravel to prevent weeds from breaking through and improves drainage. It keeps your patio looking neat with minimal maintenance.
Lastly, consider edging materials like timber, bricks, or stone. Edging keeps the gravel contained and maintains the shape of your patio.
Collecting these materials ahead of time makes the installation process smoother. It’s like preparing for a big meal—you gather everything before cooking, right?
Step-by-Step Installation Process
Credits : Charlie DIYte (CharlieDIYte)
Step 1: Excavate the Area
The first step is excavation. This means you’ll be digging. It sounds simple, but there’s a bit of technique involved. Start by removing grass, topsoil, and any debris. You want a clean slate to work with.
You’ll need to dig to a depth of at least 5 inches (about 13 cm) to properly accommodate both the stable sub-base and gravel layer. This depth is crucial – if you’re planning to put heavier furniture on the patio, you might want to go a bit deeper. It’s all about ensuring proper drainage and stability.
While digging, keep the area as level as possible. A slight slope is fine, but you don’t want any major dips. Think of it like a canvas—preparing it properly makes all the difference.
Step 2: Install Edging
Next up is edging. This part is essential. Edging defines the shape of your patio and contains the gravel. You can use timber, brick, or stone – all popular choices that add their own character to your space.
The key is to secure the edging firmly. Otherwise, the gravel might wander off. Use stakes to hold it in place. This step sets the boundaries and ensures your design stays intact.
When done right, edging provides a neat finish. It’s like framing a picture. It highlights what you’ve created and keeps everything looking tidy.
Step 3: Lay Landscape Fabric
Now it’s time for the weed prevention membrane. This fabric goes over the excavated area and is a simple yet effective barrier between your base layer and the soil below.
When laying it down, make sure to overlap the seams. This ensures no soil sneaks through. Securing the fabric with pins or rocks will keep it in place while you add gravel on top.
Don’t skip this step! It might seem minor, but it’s crucial for both preventing weed growth and improving drainage. A solid weed barrier means less hassle down the line. You’ll thank yourself later when you see fewer weeds poking through your beautiful patio.
Step 4: Add the Base Layer
Adding the base layer is next. Spread a layer of crushed stone or decomposed granite over the landscape fabric. This layer provides crucial stability.
Once you’ve spread it out, rake it level. It’s important for the surface to be even. Then, use a tamper or plate compactor to compact the layer thoroughly. Proper compaction reduces future settling and keeps the patio firm.
Think of this base layer as the foundation of a house. It needs to be solid to support everything above it.
Step 5: Add the Gravel Layer
After the base is ready, it’s time for the decorative gravel layer. Pour 2-3 inches of it over the compacted base. This is where the fun begins!
For best results, choose gravel between 4-14 mm in size – this range is optimal for stability and compaction, especially if you’re using gravel grids. The beauty of gravel is that it comes in many colors and sizes, giving you tons of design flexibility for both modern and traditional garden styles.
As you spread the gravel, make sure to rake it evenly. A well-distributed layer ensures comfort underfoot and a nice appearance.
Step 6: Compact and Finish
The final step involves compacting the gravel. Lightly walk over it or use a tamper again. This helps set it in place. Check for any low spots—those are areas where the gravel might need a bit more love.
If you find any, add more gravel as necessary. Rake it again to smooth the surface. This final touch makes everything look polished.
One of the great things about gravel patios is their environmental benefits – they’re highly permeable, allowing rainwater to drain freely and reducing the risk of puddles or runoff issues. This makes your new patio not just beautiful, but eco-friendly too!
Now you can stand back and admire your work – a beautiful, durable patio that will last for years with minimal maintenance.(1)
Tips for Success
Quality Materials Matter
Some things, you just don’t skimp on. Gravel patios fall into that bucket.
The truth is, gravel quality affects patio durability. The good kind settles in and stays put. The cheap stuff? It moves, shifts, washes out. In Charlotte, where the soil changes with the seasons and roots like to push up from below, low-grade material won’t hold up.
Start with gravel sized between 4mm and 14mm. That range compacts well and sits tight—especially if you’re using gravel grids underneath (they’re not required, but they help). The finer stuff turns dusty, and the bigger chunks don’t lock together right.
Same goes for the landscape fabric. Thin material rips fast. And once it tears, weeds take over. Not right away, but give it a season or two.
It’s kind of like shoes. The nice pair costs more, sure—but they last, and they do the job right. The bargain brand? You’ll be back at the store in six months.
So spend where it counts:
- Crushed gravel in the right size
- Heavy-duty weed barrier
- Edge restraint if needed
You won’t regret it. You’ll just rake once in a while and enjoy how solid everything feels underfoot.
Proper Layering Techniques
A good gravel patio starts from the ground down. And the order of things? It matters more than folks think.
Start by digging down at least 5 inches. You need room for:
- 2-3 inches of crushed stone (for your base)
- Weed control fabric (one solid layer)
- 1-2 inches of decorative gravel (your finish)
Compact each layer before moving on. Don’t eyeball it—use a tamper or plate compactor. Some people skip this, then wonder why the chairs wobble six months later.
And check it with a level. Not every few feet—every foot. Especially around the edges.
One more thing: slope matters. Even a gravel patio needs water to move off. Shoot for a 2% slope away from buildings. That’s about a 1/4-inch drop per foot.
It’s not glamorous work. You’ll probably sweat through your shirt. But it’s worth it.
Because when it’s all done, and the layers are tight and true, that gravel won’t budge. Not in the rain. Not when the kids run across it. Not when Charlotte’s clay soil does its yearly swell and shrink routine.
Common Gravel Choices

Gravel Types Overview
Gravel isn’t just gravel. There’s texture, shape, and weight to consider. And each one behaves a little different once it’s under your feet.
Take pea gravel, for example. It’s smooth. Rounded by water, like little river marbles. Easy on bare feet. Looks soft, almost beachy. People like it for walkways and casual sitting areas. Just know—it rolls. Not great for dining sets or spots where stability matters.
Then there’s crushed stone. Angular, sharp-edged, gritty. It doesn’t move much once compacted. That’s what makes it solid for high-traffic areas—places where folks stand, drag chairs, or roll carts.
Here’s a quick list for reference:
- Pea gravel: Smooth, 8–10mm, great for bare feet
- Crushed granite: Jagged, 10–14mm, locks in place
- River rock: Larger and polished, mostly decorative
Your pick depends on what the patio’s for. If it’s just for sitting and looking pretty? Pea gravel. If it’s for meals and gatherings? Go crushed.
Just remember—the shape of your gravel affects how it performs. Form follows function, every time.
Benefits of a Gravel Patio
Gravel patios make a strong case for themselves—especially in places like Charlotte, where soil shifts and summers run hot.
First off, they’re budget-friendly. Materials run cheaper than concrete or pavers. You don’t need a crew. You don’t even need fancy tools—just a rake, a level, and some muscle.
They’re also fast to install. A weekend of digging and compacting, and boom—you’ve got a patio. It’s the kind of project that pays off quick. You go to bed sore and wake up to something real.
And then there’s the drainage. Gravel soaks up water. No puddles, no runoff. That’s good for the yard, and better for Charlotte’s storm drains.(2)
Low upkeep, too:
- Rake it smooth now and then
- Top it off every year or two
- Pull the occasional weed
That’s it.
You get structure without the permanence. It breathes. It flexes. And if you ever want to change it, you can. No jackhammers involved.
Not bad for a pile of rock
Maintenance for Longevity
Regular Upkeep
Regular upkeep is vital for keeping your gravel patio in top shape. Periodically rake the surface to maintain an even level. This helps prevent any areas from settling unevenly.
You might also need to top up gravel as time goes on. It’s normal for some gravel to get displaced or compacted over time. The good news is that gravel patios are incredibly easy to repair—simply rake the surface and add more gravel as needed. Keeping a few extra bags on hand is a good idea.
Think of it like caring for a garden. A little attention goes a long way. The more you maintain it, the better it looks and feels.
Weed Control
Weeds can be a nuisance. Even with a proper weed prevention membrane between the base layer and gravel (which is highly recommended), some might still find a way to poke through. Control them with a weed torch or manual removal.
Using a weed torch can be effective. It’s a quick solution, but you have to be careful not to damage your beautiful gravel. Manual removal is tedious, but it’s gentle on the patio.
Keeping weeds at bay will ensure your gravel patio stays neat and pleasant. It adds to the overall beauty of your outdoor space.
Key Considerations
Gravel Depth and Stability
When planning your gravel patio, consider depth and stability. A typical gravel patio requires excavation to a depth of at least 5 inches (about 13 cm) to accommodate both a stable sub-base and gravel layer. This provides enough room for proper foundations.
Proper compaction is crucial. The base layer, usually made of crushed stone or decomposed granite, should be thoroughly compacted for stability. If the gravel isn’t compacted well, you might find it shifting underfoot—it’s like building a house on a weak foundation.
For optimal stability and compaction, choose gravel sizes between 4-14 mm, especially when using gravel grids. Taking the time to ensure everything is stable will pay off in the long run. Your patio will be a reliable space for years to come.
Slope for Drainage
Lastly, think about drainage. A slight slope away from structures is essential. This helps prevent water pooling, which can cause problems later.
A slope of about 1/4 inch per foot is typical. It might not seem like much, but it makes a big difference. One of the major benefits of gravel patios is that they’re highly permeable, allowing rainwater to drain freely and reducing the risk of puddling or runoff issues. This eco-friendly feature also means your patio will withstand freeze-thaw cycles better than rigid concrete, reducing the risk of cracking in colder climates.
These considerations will help you create a gravel patio that serves you well for years while being environmentally friendly.
FAQ
What are some popular gravel patio ideas for different home styles?
Gravel patios work with almost any home style. For modern homes, try clean lines with crushed stone patio surfaces and metal edging. For rustic looks, combine pea gravel with wooden edging or stepping stones. Create cozy spaces with a gravel patio seating area or add excitement with a gravel patio with fire pit.
Small spaces benefit from lighter colored gravel with minimal furniture, while large backyards can handle multiple zones for dining and relaxing. Add planters, water features, or pergolas to enhance the space. The versatility of gravel makes it perfect for creating unique outdoor living areas.
How much does gravel patio installation cost compared to other options?
Gravel patio cost typically ranges from $5-$10 per square foot, making it much cheaper than pavers ($10-$30) or concrete ($6-$15). Your actual gravel patio installation cost depends on size, gravel type, site preparation needs, and whether you choose DIY gravel patio methods or hire a gravel patio installation contractor.
Factor in extra expenses for edging materials, weed barriers, drainage solutions, and decorative elements like a fire pit or seating area. While professional installation adds labor costs, it ensures proper preparation and compaction, potentially saving money on future fixes.
What’s the basic gravel patio installation process for beginners?
To build a gravel patio, start with careful gravel patio preparation. Mark your area and remove 6-8 inches of soil, accounting for proper gravel patio depth. Ensure slight grading for drainage. Lay landscape fabric for gravel patio as a weed barrier. Add a 3-4 inch gravel patio base of coarse gravel and compact it. Add 2-3 inches of your chosen patio gravel and compact again.
Consider edging options to maintain stability. The gravel patio installation process typically takes a weekend for a DIY project. Complete your patio with furniture, lighting, or features like a grill or umbrella.
What materials do I need for a DIY gravel patio project?
For your DIY gravel patio, you’ll need several key materials. Start with a gravel patio weed barrier (landscape fabric for gravel patio) to prevent weeds. Choose the best gravel for patio surfaces—options include pea gravel, crushed stone, or decomposed granite. You’ll need coarse gravel for the base layer and gravel patio edging materials (brick, stone, concrete, or wood).
Gather tools like a tamper for compacting gravel patio layers, a wheelbarrow, rake, shovel, level, and garden hose. Don’t forget geotextile fabric for extra reinforcement if needed, especially for areas with poor drainage.
How do I ensure proper drainage when installing a gravel patio?
Good gravel patio drainage prevents puddles and erosion. Plan your patio on a slight gravel patio slope (about 1 inch drop per 4 feet). When preparing the site, grade away from buildings. Consider installing a gravel patio with drainage pipe for areas with heavy rainfall or poor natural drainage.
Your gravel patio base should include larger stones at the bottom, which create spaces for water to flow through. In very wet areas, add a french drain or direct runoff to a rain garden. Proper compaction between layers helps maintain drainage channels without creating low spots.
What are the differences between pea gravel patio and crushed stone patio options?
A pea gravel patio uses smooth, rounded stones that feel comfortable underfoot but can shift more easily. Pea gravel comes in various colors and creates a relaxed, beachy feel. A crushed stone patio uses angular rocks that lock together, providing better stability and less movement. Crushed stone typically looks more formal and stays in place better on slopes.
Both materials offer excellent drainage. Pea gravel tends to be quieter to walk on but may require more maintenance to keep it level. Crushed stone generally needs less frequent replenishing but can feel sharper underfoot.
How do I choose the best gravel for patio based on my needs?
Selecting the best gravel for patio depends on your priorities. For comfort underfoot, choose pea gravel or small rounded stones. For stability, angular crushed stone interlocks better. Consider colors that complement your home—tan and gray blend with most settings, while white brightens spaces, and dark colors create drama.
Smaller stones (¼-⅜ inch) feel better underfoot but may scatter more. Larger stones (¾-1 inch) stay put but are less comfortable. For areas with pets or kids, avoid very small gravel that might get tracked indoors. Local stone options often cost less and look more natural.
What are effective gravel patio edging options to keep gravel contained?
Gravel patio edging is crucial for keeping stones in place. Gravel patio with brick edging offers a classic, defined border that’s relatively easy to install. Gravel patio with stone edging provides a natural, rustic look that blends with landscapes. Gravel patio with concrete edging creates clean, modern lines and excellent stability.
Gravel patio with wood edging, using pressure-treated lumber or cedar, brings warmth but needs replacement every few years. Metal edging offers a sleek, nearly invisible solution. For a budget option, dig a small trench around the perimeter. Each gravel patio border option affects both function and style.
What maintenance does a gravel patio require throughout the year?
Gravel patio maintenance is fairly simple compared to other surfaces. Rake the surface every few weeks to keep it level and remove leaves or debris. Add new gravel annually (about ½ inch) to replace what’s been displaced. Treat weeds as they appear—pulling them or using vinegar solution rather than chemical weed killers. In winter, avoid using salt for ice melt as it can damage plants nearby.
After heavy rains, check for erosion and redistribute gravel as needed. For high-traffic areas, more frequent raking and replenishing may be necessary. Overall, gravel patios offer low maintenance compared to wood decks or pavers.
How do I prepare the ground before installing a gravel patio?
Proper gravel patio preparation starts with marking your area using stakes and string. Remove all grass, plants, and roots. Dig down 6-8 inches, ensuring the bottom slopes slightly away from buildings for drainage. Test the grade with a level. For areas with poor drainage, consider deeper excavation. If building over grass, remove all vegetation before laying materials.
Install geotextile fabric as a gravel patio underlayment to prevent weed growth and keep gravel from mixing with soil below. For extra stability, especially in soft ground, consider gravel patio reinforcement with grid systems before adding your base material.
What are the advantages of a gravel patio vs pavers for outdoor spaces?
Choosing between a gravel patio vs pavers comes down to several factors. Gravel is significantly cheaper ($5-10/sq ft vs $10-30/sq ft), offers excellent drainage, and can be installed in a weekend as a DIY project. Gravel also adapts easily to irregular spaces and curves. Pavers provide a completely flat surface for furniture, require less maintenance to keep level, and typically last longer before needing refreshing.
Gravel offers a more casual, natural look, while pavers create a more formal appearance. Gravel works better for those wanting drainage solutions, budget-friendly options, and a project for low maintenance outdoor living.
How deep should layers be when installing a gravel patio?
Getting the gravel patio depth right ensures stability and drainage. Start by excavating 6-8 inches below your desired finished height. The bottom layer should be 3-4 inches of coarse base gravel (¾-inch crushed stone or road base). After compacting this layer, add 1-2 inches of medium-sized gravel or decomposed granite as a leveling layer.
The top layer should be 2-3 inches of your chosen decorative gravel. Each layer must be compacted before adding the next—skipping compaction leads to shifting and sinking. For areas with very soft soil, you might need deeper base layers or reinforcement materials.
What tools are needed for proper gravel patio installation?
Successful gravel patio installation tools include both basic and specialized equipment. You’ll need: shovels for digging, rakes for spreading gravel evenly, a wheelbarrow for moving materials, a tape measure and string for layout, and a level to check for proper drainage slope. A plate compactor (rentable) is essential for compacting gravel patio layers properly.
A tamper works for smaller areas. Add garden stakes and string for marking boundaries, landscape staples for securing fabric, and a utility knife for cutting materials. For DIY installation, consider renting larger equipment like a mini excavator for site preparation on bigger projects.
How can I create stable areas for furniture on a gravel patio?
Creating level spots for furniture on gravel can be tricky. For gravel patio with furniture, consider placing pavers or stepping stones under chair and table legs to prevent sinking. Another option is using furniture with wide feet or adding foot pads to distribute weight. For dining areas, create a gravel patio with outdoor rug beneath the table set—choose an outdoor rug specifically designed for gravel surfaces.
Alternatively, install a gravel patio with stepping stones throughout the seating area, creating a stable mixed-surface patio. For permanent installations like an outdoor kitchen or grill, pour small concrete pads beneath the feet.
How do I install a gravel patio over concrete without demolition?
Installing a gravel patio over concrete saves demolition costs while improving drainage and appearance. Start by thoroughly cleaning the existing concrete and repairing any major cracks. Drill drainage holes every few feet if water pooling is a concern. Lay landscape fabric over the entire surface. Install edging around the perimeter to contain the gravel.
Add 2-3 inches of your chosen gravel and rake it smooth. This method raises your patio height, so consider how it affects steps or doorways. The concrete base provides excellent stability, preventing the common sinking issues that can occur with ground-based installation.
What are the best ways to prevent weeds in a gravel patio?
Preventing weeds starts with proper installation using a quality gravel patio weed barrier. Choose commercial-grade landscape fabric rather than thin plastic sheeting, overlapping seams by at least 6 inches. Secure with landscape pins every few feet. For extra protection, consider a double layer of fabric. Maintain your patio by removing any weeds immediately before they can establish root systems or spread seeds.
Occasionally spray with white vinegar solution as a natural preventive. Keep organic matter like leaves and grass clippings cleared off the surface, as these decompose into soil where weeds grow. Refresh gravel periodically to maintain adequate depth.
How do I design a gravel patio with fire pit that’s both beautiful and safe?
Creating a gravel patio with fire pit requires careful planning for safety and style. Place your fire pit at least 10 feet from structures and overhanging trees. Create a non-gravel base beneath the pit using concrete pavers or a metal fire ring set on crushed stone. Surround this with a 2-foot safety ring of larger, non-flammable stones.
Choose seating that can be positioned at comfortable distances. Consider wind patterns when placing your pit. For built-in fire features, check local building codes first. Enhance the space with gravel patio with lighting for evening ambiance, keeping lights directed away from guests’ eyes.
What are solutions for stabilizing gravel on sloped areas?
Installing a gravel patio on a slope requires special techniques for stability. For gentle gravel patio slope areas (less than 3%), use angular gravel that locks together rather than rounded pea gravel, and install strong edging. For steeper slopes, create terraces with gravel patio with retaining wall sections.
Another option is installing a cellular confinement system (plastic grid) as gravel patio reinforcement—the cells hold gravel in place even on slopes. Compacting each layer thoroughly is especially important on slopes. For very steep areas, consider gravel patio with steps integrated into the design, using timber or stone risers to create level areas.
How do I create attractive transitions between my gravel patio and other yard areas?
Smooth transitions make your patio feel connected to the landscape. Create a gravel patio walkway that gradually blends into lawn areas using stepping stones or pavers as a transition zone. For garden areas, install a gravel patio with garden border where plants slightly spill over the edge. When connecting to wooden decks, use gravel patio with steps made of matching deck material.
For transitions to other hardscapes, consider a gravel patio with brick edging that matches or complements the adjacent material. Use mixed materials—a gravel patio with raised beds can define spaces while softening transitions with greenery.
What are common gravel patio installation mistakes to avoid?
The biggest gravel patio installation mistakes include skipping proper site preparation, insufficient base depth, and inadequate compaction between layers. Never install directly on soil without landscape fabric—this leads to sinking and weed problems. Avoid using rounded gravel for base layers, as it won’t compact properly.
Don’t skimp on edging, especially in high-traffic areas. Ensure proper slope for drainage (1% minimum) to prevent puddles. Don’t spread gravel too thinly—maintain at least 2 inches of top gravel. Finally, avoid mixing gravel sizes in the same layer, which creates an unstable surface and uneven appearance.
What timeline should I expect for a DIY gravel patio installation?
The gravel patio installation time depends on size and complexity. For a typical 12×12-foot patio, expect to spend one full weekend. Day one involves marking the area, excavating soil (3-4 hours), installing landscape fabric (1 hour), adding and compacting the base layer (2-3 hours). Day two includes adding the final gravel layers (2 hours), compacting (1 hour), and installing edging (2-3 hours).
Larger patios, difficult soil conditions, or added features like a fire pit or seating area will extend the timeline. Working with a helper significantly speeds up the process, especially for moving heavy materials.
How can I design a gravel patio for outdoor dining that’s practical and attractive?
A gravel patio for outdoor dining needs stability for furniture and comfortable walking surfaces. Start with angular gravel that compacts well, installing it at least 4 inches deep with thorough compaction. Create a stable zone for the table and chairs using embedded stepping stones or a patio with outdoor rug designed for gravel surfaces.
Consider a gravel patio with pergola for shade and atmosphere. Include gravel patio with lighting for evening meals—solar path lights or string lights work well. Choose furniture with wide feet to prevent sinking. For convenience, position your gravel patio with grill nearby but allow space for heat and smoke dissipation.
What considerations are important when installing a gravel patio for pets or kids?
When creating a gravel patio for pets or gravel patio for kids, choose rounded materials like pea gravel rather than sharp crushed stone to protect paws and bare feet. Select slightly larger stones (3/8-1/2 inch) that won’t easily stick in paws or get kicked around by little feet. Install robust edging to contain the gravel. Consider creating gravel-free zones with stepping stones or pavers for play areas or pet relief spots.
Thoroughly compact the base to prevent digging. For cats, avoid fine gravel that resembles litter. Rinse all gravel thoroughly before installation to remove dust that could be tracked indoors.
How do I incorporate plants and landscaping with a gravel patio design?
Blending plants with your gravel patio creates a natural, inviting space. Create a gravel patio with planters—either permanent built-in types or movable containers—positioned strategically for privacy or visual interest. For a garden feel, design a gravel patio with raised beds along the edges. Choose drought-tolerant plants that won’t drop excessive debris onto the gravel.
Consider leaving planting pockets within the patio where the landscape fabric is cut away. For visual separation, install a gravel patio with privacy screen using tall grasses or bamboo. Add herbs near dining areas for fragrance and convenience when cooking outdoors.
What are the best options for gravel patio with water feature installations?
Adding a water feature brings tranquil sounds and visual interest to your gravel patio. For simplicity, choose self-contained fountains that sit above the gravel, requiring only a power source. For more elaborate features, create a gravel patio with water feature built on a concrete pad beneath the gravel layer. Small ponds work well when lined properly and surrounded by larger stones for stability.
Pondless water features—where water disappears into a gravel-filled basin—are low-maintenance options. Always run electrical lines through conduit before installing gravel, and use water-resistant connections. Position water features where splashing won’t create muddy areas.
How do I maintain gravel patio stability in areas with freeze-thaw cycles?
In cold climates, freeze-thaw cycles can disrupt gravel patios. Ensure proper gravel patio stability by installing a deeper base layer (4-6 inches) of crushed stone with excellent drainage. The angular stones lock together when compacted. Install proper gravel patio drainage with slight grading and consider a perimeter drain for areas with poor natural drainage.
Use commercial-grade geotextile fabric as gravel patio underlayment to prevent mixing of layers. Choose a gravel patio edging system that can handle ground movement—metal edging or large stone borders work well. Avoid using sand in any layer, as it traps moisture that expands when frozen.
Conclusion
There’s a look to Charlotte yards, folks wanting a clean spot outside. Building a gravel patio offers that, a pretty simple thing really. Homeowners dig down (maybe 4–6 inches for a solid feel), lay landscape fabric perhaps, then add a sturdy base, the gravel goes right on top.
This new spot provides a place for sittin’, it doesn’t need much care, that’s for sure. Just gravel. Looks good too, probably better than bare dirt anyway. Choose your stone carefully.
And if you’re ready to swap out mud for something that lasts, get started with your gravel patio installation today—your backyard will thank you.
Related Articles
- https://lapispatios.com/articles/gravel-patios/
- https://lapispatios.com/articles/low-maintenance-gravel-patios/
- https://lapispatios.com/articles/gravel-patio-design-ideas/
References
- https://decorativeaggregates.com/blogs/how-to-guides/simple-guide-to-laying-a-gravel-garden-patio
- https://baileylineroad.com/how-to-build-a-beautiful-gravel-patio-or-walkway-without-hiring-a-pro/