Gravel patios are the go-to option for homeowners who want charm, function, and affordability—here’s how to design and build one that fits your lifestyle.
Gravel patios transform Charlotte’s backyards into functional retreats without breaking the bank. Most local homeowners spend between $4-8 per square foot (materials and labor), making them 60% cheaper than concrete alternatives. The crushed stone, typically 3/8 inch river rock or granite chips, drains naturally and needs just occasional raking to stay level.
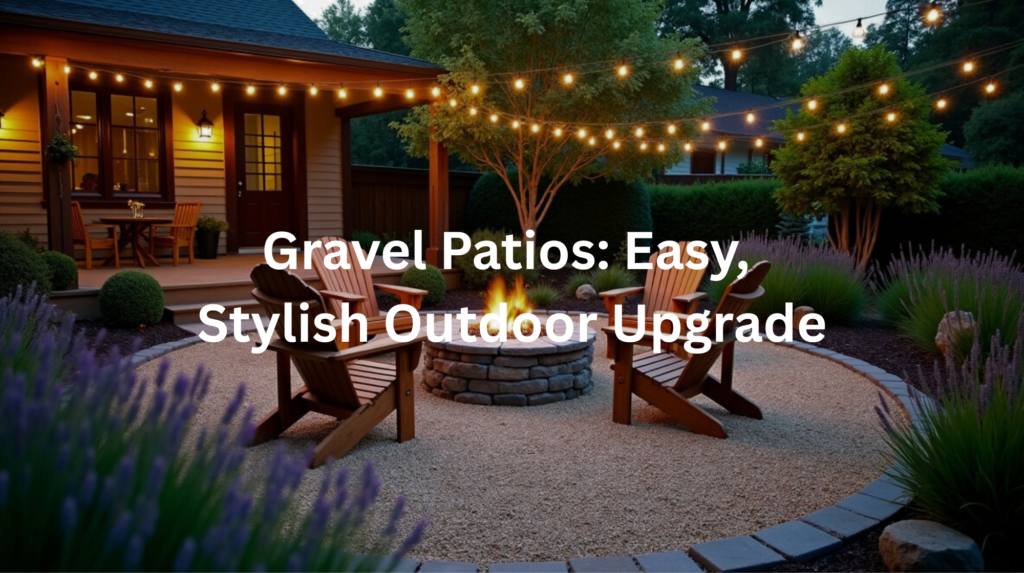
These patios work great around fire pits, under pergolas, or as standalone gathering spots. They’re perfect for our red clay soil, which tends to shift during freeze-thaw cycles. The loose stones just move with the ground instead of cracking.
Want to learn more about creating your own gravel patio? Keep reading for material options and step-by-step installation tips.
Key Takeaway
- Gravel patios are budget-friendly and easy to install, making them ideal for DIY enthusiasts.
- They provide excellent drainage and require minimal maintenance, allowing for more time enjoying your outdoor space.
- A variety of design options and materials can be used to customize gravel patios to reflect personal style and functionality.
What Are Gravel Patios?
Gravel patios are fascinating spaces. They’re not like the usual concrete or stone patios. Instead, they’re covered with loose gravel, which gives a natural look. This makes them perfect for many activities. People can dine, relax, or even entertain guests on these unique surfaces. In Charlotte, North Carolina, gravel patios are becoming a popular choice for homeowners wanting to add charm to their backyards.(1)
Think about how a gravel patio can change the feel of an outdoor area. It can create a cozy nook for morning coffee or a lively spot for evening barbecues. The flexibility of gravel allows for personal touches. Homeowners can choose colors and sizes of gravel that match their style.
It’s a chance for creativity! You might even see a pea gravel patio or one with decorative stones. The possibilities are endless, making gravel patios a fun choice for those wanting to enhance their outdoor living space.
Low-Maintenance Gravel Patios
Low-maintenance options are a big deal for busy homeowners. Gravel patios fit this description perfectly. They don’t crack or fade like concrete. This means they’ll look good for a long time without much effort. When they do need a touch-up, it’s easy. Just add a bit of new gravel, and they’re good as new.
The upkeep is minimal, which is a huge plus. Homeowners in Charlotte appreciate that. With just a little raking every now and then, and removing debris, gravel patios stay neat. This simplicity makes them a great option for families, especially those with kids or pets. Less time spent on maintenance means more time enjoying the outdoor space.
Imagine a sunny afternoon spent lounging on a gravel patio, free from the worries of upkeep. That’s what a low-maintenance gravel patio can offer.
Pros and Cons of Gravel Patios
Credits : Niall Gardens
Gravel patios come with their own set of pros and cons. Understanding these can help homeowners make the right choice.
Pros
- Affordability: Gravel is incredibly budget-friendly, costing between $20 to $100 per cubic yard or $10 to $50 per ton. Compare this to flagstone patios which can run $200 to $550 per ton, and you’ll see why gravel is such a popular choice for cost-conscious homeowners.
- Ease of Installation: Many folks opt for DIY gravel patios. The process doesn’t require specialized skills, making it accessible to many.
- Natural Drainage: Gravel allows rainwater to flow through, which is great for areas that often get puddles. In fact, gravel patios can reduce rainwater runoff by up to 50% compared to non-porous materials, helping prevent flooding in your yard.
- Design Versatility: Gravel can fit any style, whether it’s rustic, modern, or somewhere in between.
Cons
- Comfort: Walking on gravel can be uncomfortable, especially barefoot.
- Furniture Stability: Tables and chairs might need adjustments to stay stable.
- Weed Growth: Without proper barriers, weeds can pop up, requiring additional maintenance.
Balancing these pros and cons is key. Homeowners should think about their lifestyle and preferences. A gravel patio can be a great choice if they value affordability and ease of installation.
Gravel Patio Design Ideas
When it comes to design, gravel patios shine with creativity. There are countless ways to enhance these outdoor spaces.
Mixing Materials
Gravel crunches underfoot in a way that feels grounded, almost primitive. But left on its own, it can look unfinished. Pairing gravel with larger pavers or flagstones changes that completely. It builds contrast. And it guides movement—people know where to walk, where to stop.
The most common method?
- Set 24-inch concrete pavers (2 inches thick) in a grid.
- Fill the 2–3 inch spaces between them with 3/8-inch pea gravel.
- Use crushed granite or river rock if you want a softer visual.
This setup creates texture—visual and tactile—and helps with drainage. Gravel fills settle naturally between the stones, but edging (usually metal or composite) keeps everything locked in.
It’s not just about looks. Wide-set pavers give stability for chairs and feet, while gravel makes it easy to change shapes or paths later on. Flexibility.
That kind of modular setup suits patios that change with the seasons—or the people using them.
Decorative Edging
Gravel likes to shift. Wind, water, footsteps—they all move it. That’s where edging earns its keep. It’s not just about containment—it defines space. Like punctuation at the edge of a thought.
Some folks go clean. Galvanized steel edging, only 1/8 inch thick, creates a near-invisible barrier. Others want warmth, so they use cedar or recycled timber. Stone? That’s for permanence. Maybe 6-inch cobbles or brick laid end to end.
- Metal: sleek, rust-resistant, modern
- Wood: softer tone, easier to cut
- Stone: heavy, natural, harder to adjust
Installing it matters too. Dig 3 inches down, level it, anchor with stakes if it’s metal. Let the gravel fall just below the top edge. That keeps it tidy.
Edging also separates garden beds from walking zones. Which helps when weeds try creeping in or mulch tries to escape. Think of it as the line between wild and planned. It’s small, but it says, “this part’s on purpose.”
Plant Integration
Sometimes, patios feel too… flat. Even with gravel. That’s where plants change everything. They pull the eye up, soften lines, add sound (wind through leaves), sometimes scent.
Start with native plants. They know the soil, they survive on rain, and they pull in bees and birds without much fuss. Around the edges, leave 12–18 inches for low-growing varieties. Ornamental grasses like blue fescue or native sedge work well.
Then mix in:
- Lavender (12–16 inches tall, drought-tolerant)
- Echinacea (adds color, attracts pollinators)
- Creeping thyme (fills cracks, smells great)
Let taller plants stand behind seating. That helps frame the patio, adds shade, maybe even privacy. Roots hold gravel in place too, especially on slight slopes.
There’s a balance here—structured gravel below, wild movement above. Makes the whole thing feel more alive. Just water occasionally and trim back when things sprawl too far. Let the edges blur.
Gravel Patio Installation
Installing a gravel patio can be an enjoyable and cost-effective project for many homeowners. With prices ranging from $20 to $100 per cubic yard (or roughly $10 to $50 per ton), gravel is one of the most affordable landscaping materials available—significantly less expensive than flagstone, which can cost $200 to $550 per ton.
Step-by-Step Installation
- Design and Mark: First, decide where to place the patio and what shape it will have. Marking the area with string and stakes helps visualize the layout.
- Excavate the Area: Dig down about 6 to 8 inches for standard patios and walkways. For areas that will experience heavier use, you may need to dig deeper.
- Install Edging: Use timber or metal materials to keep the gravel contained. This is essential for maintaining the shape of the patio.
- Prepare the Base: A solid base layer is crucial. Compacted gravel or crushed stone provides stability and should be thoroughly compacted.
- Lay Weed Barrier: Adding landscape fabric can help keep weeds at bay, making maintenance easier.
- Spread Gravel: Finally, pour and rake out the chosen gravel to a depth of 2 to 3 inches. Smooth it out for an even finish.
Common Mistakes
Some common mistakes can happen during installation. Neglecting drainage is a big one. Proper drainage allows water to flow and prevents puddles. Skipping the weed barrier can lead to more maintenance down the line. It’s essential to take these steps seriously for a long-lasting patio.
Using Gravel for Patio Foundation
The foundation is a critical part of any gravel patio. Choosing the right gravel makes all the difference.
Choosing the Right Gravel
Gravel makes a sound when you walk on it. Not loud, but steady—like a whispering crunch under your shoes. That sound changes depending on the type. Pea gravel barely whispers. Angular gravel talks back.
Pea gravel (about 3/8-inch diameter) feels nice—rounded by water and time. It works well in places meant for sitting or slow walking, like under a bench or around a fire pit. It doesn’t bite into your shoes. And it drains fast too, since it’s loose and round.
But it shifts. That’s the trade-off. It rolls underfoot and spreads out of place. In high-traffic zones—walkways, driveways, spots near steps—angular gravel is better.
Why? Because of the shape.
Angular gravel:
- Locks together (thanks to flat sides)
- Resists shifting
- Handles weight better (cars, wheelbarrows, lots of feet)
3/4-inch crushed granite or limestone stays where it’s spread. Less scatter. Less raking.
So—think about how the gravel will be used. Smooth for comfort. Angular for strength. One’s not better. Just better suited.
Base Layer Preparation
Dry gravel sinks fast without a base. First rain, it settles. Then dips form, sometimes puddles. A base layer stops that.
Crushed stone—often called “road base” or “Class 5”—is what folks usually use. It’s jagged, with dust mixed in. That dust matters. It fills in gaps when compacted. Makes it tight. Solid.
Use about 4 to 6 inches of base. Spread it in layers, 2 inches at a time, then tamp it down. Can’t just toss it all in and stomp. Needs patience. Needs pressure.
A strong base:
- Stops sinking
- Helps drainage (especially with proper slope—1/4 inch per foot)
- Keeps the top gravel flat
Some folks add landscaping fabric below (to block weeds), though not everyone agrees it’s needed.
On clay soil? Add a little more depth. In wet areas? Use crushed granite—it sheds water better.
Gravel’s only as good as what’s under it. Most shifting problems? Almost always the base.
Gravel Patio Drainage Solutions

Drainage is a big concern for many homeowners when considering a gravel patio. Thankfully, gravel naturally provides excellent drainage.
Natural Drainage Benefits
Gravel listens to water. That’s how it felt one afternoon after a spring rain—no splashy tantrums, no puddles sticking around. Just quiet absorption. Unlike concrete or asphalt, gravel patios soak it up. The stones shift a little, but they drink deep.
Gravel is porous, which means water can pass through the gaps between the rocks. This permeability helps water reach the ground instead of running off into the street or your neighbour’s yard. When compared to non-porous paving, it might cut runoff by nearly 50% (based on soil type and slope).
Some folks think this is only good for aesthetics, but it’s more than that.
- It prevents standing water (which attracts mosquitoes).
- Helps prevent soil erosion during storms.
- Reduces pressure on storm drains and sewers.
For homes that deal with soggy patches or pooling after a hard rain, gravel patios might be the fix. Not perfect. But close. Just make sure the base is properly layered (a compacted mix of crushed stone and sand usually works best).
Integrating with Rain Gardens
The thing about gravel—besides its crunch underfoot—is that it plays well with plants. Especially in yards that get too much water. That’s where rain gardens come in.
A rain garden is a shallow, planted dip in the ground that collects and filters rainwater. When you build a gravel patio next to or even as part of one, the setup works like a sponge. Instead of water racing off, it slows down, sinks in, feeds the roots.
Design matters here. Keep an eye on these things:
- Use native plants that handle wet-dry cycles.
- Make sure the gravel slopes slightly toward the garden.
- Use a mix of 3/8″ crushed rock and larger stones near the base.
This combo handles runoff naturally, often reducing water pooling near foundations or patios. It’s quiet work—no pumps, no drains—just gravel and greenery managing water where it lands.
Maintenance for Gravel Patios
Maintenance might seem like a daunting task, but it can be quite simple.
Regular Upkeep
Regular upkeep for gravel patios is straightforward. Homeowners should rake the gravel periodically. This helps maintain an even surface, especially after heavy use or storms.
- Weed Control: Using landscape fabric and occasional hand-pulling can help manage weed growth.(2)
- Debris Removal: Keeping the patio clean is essential. A leaf blower or rake works wonders to clear leaves and debris.
Seasonal Care
When winter rolls around, it’s crucial to prepare the gravel patio. Removing leaves and snow carefully will help maintain its structure. Homeowners should be gentle while shoveling snow to avoid disturbing the gravel.
With proper installation and maintenance, your budget-friendly gravel patio can provide a beautiful and functional outdoor space for years to come.
FAQ
What are the benefits of installing a gravel patio compared to other options?
Gravel patio benefits include affordability, excellent drainage, and easy DIY installation. Unlike concrete or pavers, gravel patios can be installed in a weekend without special tools. They’re also eco-friendly since water drains through instead of running off. Gravel adds natural texture and sound to your outdoor space.
When comparing gravel patio vs concrete or gravel patio vs pavers, gravel is typically much less expensive and more forgiving on uneven terrain.
How do I choose between pea gravel and crushed stone for my patio?
Pea gravel vs crushed stone comes down to a few key differences. Pea gravel patio surfaces feel smoother underfoot with round, small stones that shift more when walked on. Crushed stone has angular edges that lock together, creating a more stable surface.
Pea gravel offers more color options and a softer look, while crushed stone provides better stability. Your choice depends on your priorities – comfort for barefoot walking or stability for furniture.
What are some popular gravel patio ideas for different yard sizes?
Gravel patio ideas work for any space. For gravel patio for small yards, try circular designs with built-in seating to maximize space. Backyard gravel patio designs for larger yards can include multiple zones – perhaps a gravel patio seating area connected to a gravel patio with fire pit by a gravel patio walkway.
Gravel patio for large yards can incorporate islands of plantings or stepping stones to break up the space. Modern gravel patio designs often use geometric shapes, while rustic gravel patio styles blend into natural surroundings.
What does a typical gravel patio installation process involve?
Gravel patio installation starts with marking your area and removing 4-6 inches of soil. Next, add a gravel patio base layer of coarse crushed stone for stability. Install gravel patio fabric to prevent weeds and keep stones from mixing with soil. Add 2-3 inches of your chosen gravel and rake it level.
Compacting gravel patio surfaces helps create stability. Consider gravel patio edging like metal strips, stone, or brick to keep gravel contained. DIY gravel patio projects can typically be completed in a weekend with basic tools.
How much does a gravel patio typically cost?
Gravel patio cost is much lower than other paving options. Materials for a DIY gravel patio typically run $2-$5 per square foot, including base materials and fabric. Professional gravel patio project cost ranges from $5-$10 per square foot installed. The best gravel for patio use costs $40-$100 per ton depending on type and color.
Gravel patio edging adds $1-$15 per linear foot depending on materials. While upfront cost is low, factor in some ongoing expenses for occasional gravel replenishment.
What maintenance does a gravel patio require throughout the year?
Gravel patio maintenance is fairly simple but consistent. Regular raking keeps the surface level and prevents low spots. Gravel patio weed control requires pulling occasional weeds or applying vinegar solution. Gravel patio seasonal care includes checking drainage after heavy rains and adding fresh gravel every 1-2 years as stones settle or scatter.
Gravel patio cleaning is as simple as raking debris and occasionally rinsing with a garden hose. Low maintenance patio benefits make gravel an attractive option for busy homeowners.
What are some creative gravel patio design options?
Gravel patio design offers endless possibilities. Mix gravel patio with pavers to create defined walking paths or dining areas. Gravel patio with stepping stones adds visual interest and practical walking surfaces. Consider gravel patio shapes beyond the standard rectangle – curves and free-form designs work well.
Gravel patio color options range from warm tans to cool grays and even blues or reds. Gravel patio inspiration often combines multiple materials – try gravel patio with flagstone borders or gravel patio with brick accents.
What are common gravel patio drainage issues and solutions?
Gravel patio drainage is naturally excellent, but problems can occur. Install a slight slope (1-2%) away from buildings. For gravel patio on a slope, create terraces with small retaining walls. Use gravel patio drainage solutions like French drains for areas with heavy water flow. A proper gravel patio base layer of crushed stone helps prevent puddles.
Gravel patio moisture control matters – make sure the site isn’t in a low spot where water collects. Properly installed, gravel patios handle rain much better than solid surfaces.
How can I make my gravel patio more functional for entertaining?
Create a perfect gravel patio for entertaining by defining zones. Include a gravel patio for outdoor dining with stable surfaces for tables and chairs. Add a gravel patio with fire pit as a gathering spot. Gravel patio furniture should have wide legs or platforms to prevent sinking.
Gravel patio lighting along paths and gathering areas extends usability into evening. Consider gravel patio with pergola for shade and structure. Gravel patio water features add ambient sound and visual interest for guests.
What are the main disadvantages of gravel patios to consider?
Gravel patio disadvantages include some maintenance needs. Stones can scatter onto lawn areas without proper gravel patio border containment. Gravel patio accessibility can be challenging for wheelchairs or walkers. Snow removal is more difficult than on solid surfaces. Gravel patio for kids may result in stones being picked up and played with.
Gravel patio for pets might lead to some stones being kicked into the house. Furniture can sink slightly over time. Despite these issues, many find the benefits outweigh these gravel patio mistakes to avoid.
How can I incorporate plants and landscaping with my gravel patio?
Gravel patio landscaping creates beautiful outdoor spaces. Place gravel patio plants in containers to define areas and add height. Use drought-tolerant plants that complement the informal look. Gravel patio for garden settings works well with Mediterranean or desert plants. Consider gravel patio border plantings to soften edges.
Leave planting pockets within the gravel for herbs or small perennials. Gravel patio with stepping stones can create paths through planted areas. These elements boost gravel patio curb appeal and connect the space to your broader landscape.
Conclusion
Sunlight on Charlotte gravel patios creates shifting shadows that appear to dance on the small stones. Homeowners find these patios offer easy upkeep; they don’t require much fuss. A simple feature.
Typically composed of pea gravel or perhaps angular stone spread about four inches deep, which helps water soak in well, the gravel sits on a compacted base underneath. They offer real design flexibility. A good choice for a backyard transformation. Installation is often quick too. Edging might be needed later to keep the area tidy. These patios serve as good practical spots.
Ready to bring one to your yard? Gravel patios are a down-to-earth way to upgrade your outdoor space—get in touch now and let the transformation begin.
References
- https://decorativeaggregates.com/blogs/how-to-guides/simple-guide-to-laying-a-gravel-garden-patio
- https://www.twaggregates.co.uk/laying-a-gravel-garden-patio/