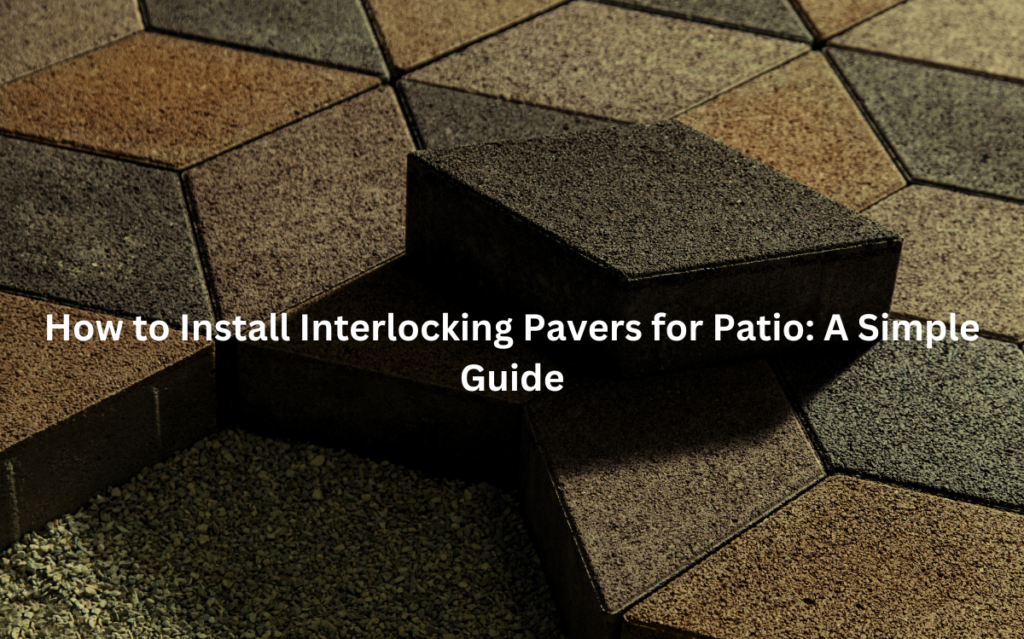
Transform your outdoor space with a professional-looking patio. Learn how to install interlocking pavers easily and effectively.
Installing interlocking pavers is a simple and effective way to enhance your patio. Whether you’re doing it yourself or hiring a pro, this article will walk you through each step—from preparing the base to placing the pavers.
With the right materials and techniques, you can create a strong, beautiful outdoor space that lasts for years. Follow these tips for a smooth installation and a patio that adds value to your home.
Key Takeaways
- Planning is Key: Choose the right pavers, layout, and design to suit your outdoor space and needs.
- Proper Base Preparation: Ensure proper excavation and base compaction for a stable foundation that prevents shifting over time.
- Regular Maintenance: Keep your patio looking fresh by sweeping debris, filling joints with sand, and resealing polymeric sand periodically.
Materials and Tools Needed
Before starting your interlocking paver project, make sure you have all the right materials and tools. This is key to avoiding any unnecessary delays or frustrations along the way. (1)
Interlocking Pavers:
These are available in various styles, colours, and durability options, from natural stone to concrete. Choose based on your patio design, whether you’re aiming for a rustic feel with cobblestone pavers or a sleek, modern look with concrete pavers.
Crushed Stone or Gravel:
This will form the base material. It’s essential to have a solid foundation, and crushed stone (3/4-inch) or gravel works well for this.
Polymeric Sand:
Polymeric sand is ideal for filling the joints between your pavers. It’s designed to harden when activated with water, locking the pavers in place and preventing weeds from growing through.
Geotextile Fabric (Optional):
This can be placed underneath the gravel to prevent weed growth and help maintain the integrity of your base layer.
Edging Restraints:
These help to secure the pavers in place and prevent them from shifting. They are available in plastic, steel, or concrete materials.
Plate Compactor or Hand Tamper:
This piece of equipment is crucial for compacting the base material and the pavers to ensure everything is stable.
Other Tools:
A rubber mallet for tapping the pavers into place, a measuring tape for accuracy, a level to ensure evenness, a shovel, rake, and broom to handle sand and gravel.
Step 1: Planning and Design
Planning a patio is like sketching a map before a road trip. It sets the path for everything to come. Without it, the project could go off track. (2)
Select Size, Shape, and Pattern:
First, think about the size of the patio. Is it small and intimate? Or a large space that’ll host weekend gatherings? Measure the area carefully. Pavers come in different sizes, so a pattern like herringbone or running bond can add style while making the space feel bigger (or cozier, depending on your choice).
Mark the Perimeter:
Once the design’s in your head, it’s time to mark the area. Grab some stakes and string. Set them up around the patio boundaries. This gives you a visual guide, so you know exactly where each paver goes. Straight lines are key here—use a measuring tape to make sure the spacing’s spot-on. The more precise this step, the easier the rest of the process will be.
Step 2: Excavation and Base Preparation
Excavation is the backbone of any patio project. Without a solid foundation, everything else falls apart. It might seem like a lot of digging, but trust me, it’s worth it.
Excavate the Area:
Start by digging out the patio area. Aim for a depth of about 6-8 inches, enough room for your base material and pavers. If it’s a smaller area or just a walkway, 4-6 inches could work. Check your measurements along the way—make sure you’re not off by a fraction, or it’ll show later.
Ensure Proper Slope:
Water can destroy a patio if it’s not sloped right. You want the water flowing away from buildings or structures, not pooling near them. A 1-inch slope for every 4 feet is the magic number (this helps with drainage).
Base Material Compaction:
After laying down the base material, which is usually crushed stone or gravel, grab a plate compactor. Compact the base well, so it doesn’t shift or settle. The more you compact it, the more stable your patio will be in the long run.
Step 3: Bedding Sand Installation
Once the base is in place, the real fun begins. Bedding sand might seem like just another layer, but it plays a crucial role in making your patio level and smooth.
Spread a 1-Inch Layer of Coarse Sand:
The key here is to use coarse sand (like concrete sand). It’s designed to settle easily and creates a smooth surface. You’ll want to spread about 1 inch of this sand over the compacted base—just enough to cover everything evenly without going overboard.
Level the Sand:
Leveling the sand is crucial. Grab a rake and spread the sand as evenly as possible. Then, use a screed board to make sure it’s level. Don’t compact the sand at this point, just get it nice and smooth. This will be the surface your pavers sit on, so take your time with this step.
Step 4: Laying and Cutting Pavers
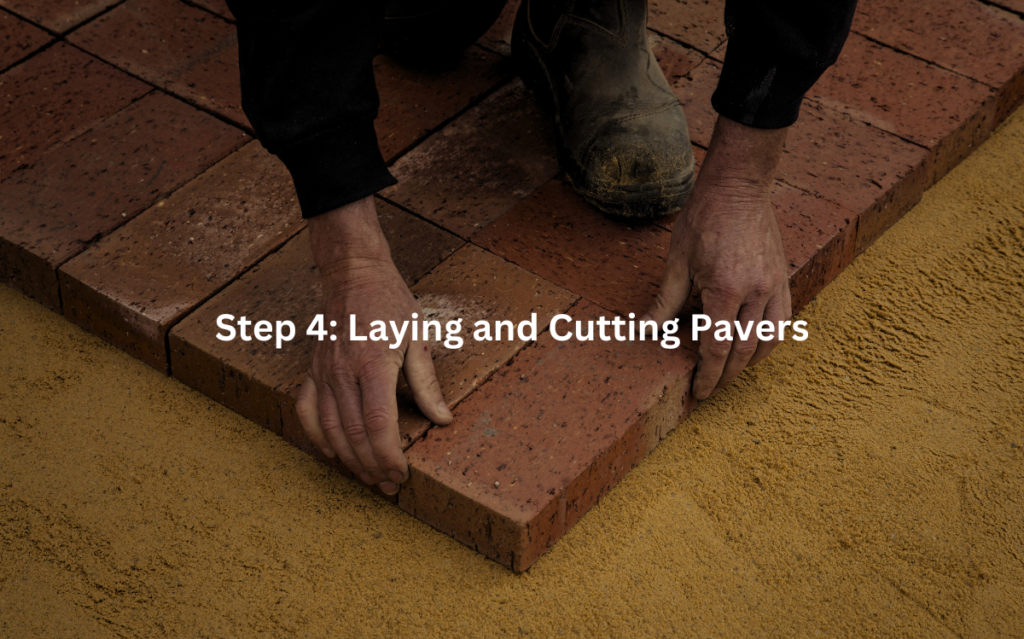
Laying pavers is where the work comes to life. It can be satisfying, but it requires precision.
Start at One Corner:
Begin in a corner and work your way out. Make sure each paver follows the design you’ve planned. Take it row by row, ensuring the pavers are snug and aligned. It’s all about getting that perfect fit.
Tap the Pavers into Place:
Use a rubber mallet to tap each paver. This helps ensure it sits tight against its neighbors. Don’t forget to check with a level—pavers need to be even, or you’ll regret it later.
Cutting Pavers:
You’ll probably need to cut some pavers for edges or tricky spots. A masonry saw will do the job, or use a hammer and chisel for a cleaner cut. Measure twice, cut once—especially when dealing with odd shapes. Take it slow to get those perfect cuts.
Step 5: Compaction and Leveling
After the pavers are in place, it’s time to lock them down. This step makes sure they stay put.
Use the Plate Compactor:
Grab a plate compactor (a rental’s fine) and run it over the pavers. This helps them settle into the sand. You want them snug, secure, and in place. A little pressure goes a long way here.
Ensure Levelness:
Once compacted, take a moment to check the level. If any pavers have shifted, tap them back into position with the mallet. It’s all about making sure the surface stays even. Keep at it until everything’s aligned perfectly.
Step 6: Filling the Joints
Filling those tiny gaps is what keeps everything solid. It also makes the patio look cleaner.
Sweep Polymeric Sand into the Joints:
After laying down your pavers, spread polymeric sand over the surface. Sweep it into the joints with a broom. Fill all those cracks nice and deep.
Activate the Polymeric Sand:
Now, lightly mist the surface with water. This activates the polymeric sand, hardening it and locking everything together. It’ll help keep weeds from creeping in.
Step 7: Maintenance and Troubleshooting
Like anything worth having, a patio needs care. With a little effort, it’ll stay looking sharp.
Regular Sweeping:
It’s simple, really. Sweep the patio every so often. Clear away dirt, leaves, or small debris. If you let it build up, you might end up with stains or grime between the pavers. Not ideal.
Reapply Joint Sand:
The polymeric sand between the pavers won’t last forever. Over time, it might wash away or settle. Just sweep in fresh sand and activate it with a light mist of water. It’s easy to do and helps keep everything tight.
Check for Shifting Pavers:
If you see a paver out of place, don’t panic. Grab a rubber mallet, tap it back into position, and top off with more sand. If you’re noticing this often, you might need to check the base or compaction level again. It happens.
Conclusion
Installing interlocking pavers is a rewarding DIY project that enhances your outdoor space. With careful planning, proper base preparation, and attention to detail, your patio will not only look great but also stand the test of time. Regular maintenance, like sweeping debris and resealing joints, will keep it in top shape.
With these steps, you’ll have a durable, beautiful patio to enjoy for years to come.
For professional installation and expert craftsmanship, contact Lapis Patios and bring your vision to life.
FAQ
What is the purpose of a plate compactor in paver installation?
A plate compactor is essential in paver installation because it helps compact the base material and sand layers, ensuring a stable and level surface. Using a Vibratory plate compactor ensures that the gravel base and sand bedding are compacted tightly, preventing any shifting of the pavers over time. Proper compaction is vital for the durability of the paver patio and ensures the pavers sit evenly without settling.
How do you choose the right joint sand for pavers?
When selecting joint sand for your paver project, it’s crucial to pick high-quality polymeric sand. This type of sand bonds with moisture, hardening within the paver joints. This helps prevent weed growth and keeps the pavers tightly locked in place. Sweeping polymeric sand into the joints between pavers and activating it with water will improve the aesthetic appeal while providing added stability to your patio or driveway pavers.
What is the correct depth of excavation for a paver patio?
For a successful paver patio installation, the excavation depth should be around 6-8 inches, depending on the paver material and the type of traffic the patio will handle. For pedestrian areas, a 4-inch gravel base and a 1-inch sand layer should suffice. Ensure that the excavation has a slight slope for drainage, as improper drainage could cause water to pool and damage the paver surface.
Why is proper drainage important when installing pavers?
Proper drainage is critical when installing a paver patio because it prevents water from accumulating beneath the pavers, which could shift them over time. A slight slope of about 1 inch per foot, combined with a gravel base, promotes drainage and ensures that water flows away from the patio. Without proper drainage, you might face issues with a sinking patio or pooling water, which can damage the paver surface.
How does a sand bedding layer affect the paver installation?
A sand bedding layer helps create a level surface for your paver units. The layer, typically about 1 inch in thickness, ensures that the pavers sit evenly and tightly together. Concrete sand or a sand layer made of fine particles is commonly used to fill the gaps between pavers. This provides a smooth surface, ensuring the pavers settle properly during the compaction process, resulting in a stable and long-lasting patio.
What are the pros and cons of paver patios?
Paver patios offer a strong, attractive surface for outdoor living, but there are both benefits and challenges. On the plus side, they’re durable, easy to maintain, and come in various styles. However, they can be costly to install, and over time, the pavers may shift, requiring re-leveling. Proper drainage is also crucial to prevent water from pooling between the pavers, which could lead to weed growth and erosion.
What is the role of retaining walls in patio installation?
Retaining walls are essential for creating a stable foundation, especially in sloped areas. They help control soil movement and prevent erosion. When installing a patio, retaining walls provide structural support, especially for elevated sections. Depending on the project, they might be built using natural stone, concrete, or even interlocking pavers, and can add both functionality and aesthetic appeal to your outdoor space.
References
- https://www.homedepot.ca/en/home/ideas-how-to/outdoors/patio/how-to-install-patio-pavers.html
- https://www.landscapemanagement.net/step-by-step-how-to-lay-interlocking-pavers/