Learn the step-by-step process to seal your paver patio, ensuring long-lasting durability and a vibrant, stain-free surface.
Sealing your paver patio is a quick and effective way to protect it from stains, weather damage, and general wear. The process enhances its appearance, keeping colors vibrant and preventing weeds from growing between the pavers.
Whether you’re a DIY enthusiast or new to the task, applying a quality paver sealer ensures long-lasting protection. From cleaning and repairing cracks to choosing the right sealer, this article covers all the steps needed to get the job done efficiently.
With proper care, your paver patio will stay looking great for years, making it the perfect space for outdoor gatherings.
Key Takeaways
- Sealing your pavers protects against stains, weather damage, and extends their lifespan.
- Proper preparation, including cleaning and repairs, is crucial for a flawless finish.
- Regular maintenance and resealing every 3-5 years keep your patio looking vibrant and new.
Benefits of Sealing Paver Patios
Sealing a paver patio is like giving it a layer of protection against everything nature and life throws at it. Rain, UV rays, and snow gradually break down unsealed pavers, causing them to fade and crack. A quality sealant preserves their color and texture, ensuring they look new for years.
It also makes maintenance a breeze. Oil spills, dirt, and wine stains don’t stand a chance on sealed pavers because the sealant keeps them from sinking in. This means less scrubbing and fewer permanent marks.
Another huge advantage? Sealing locks in joint sand, the material between pavers. Without it, weeds creep in, ants tunnel through, and the pavers start shifting. By sealing, you’re keeping your patio stable and weed-free.
Key benefits include:
- Weatherproofing: Protects against water, snow, and sun damage.
- Stain resistance: Blocks spills and stains.
- Stability: Prevents shifting and weed growth.
Sealing isn’t just aesthetic—it’s practical.
When to Seal Your Pavers
Sealing paver patios at the right time makes all the difference. For a newly installed patio, you’ll need to wait 15–30 days before applying sealant. This allows the joint sand to settle into place. Jumping the gun can cause the sealant to displace the sand, leaving gaps for weeds and instability.
After that, resealing depends on how much use your patio gets and your local weather conditions. For patios in high-traffic areas or exposed to harsh winters, sealing every 2–3 years is a safe bet. In milder climates or for patios with less use, resealing every 4–5 years should be sufficient.
To know if your patio needs resealing, try the water test. Pour water onto the surface—if it absorbs quickly instead of beading up, it’s time to reseal.
Timing checklist:
- New patios: Wait 15–30 days.
- Frequent use: Seal every 2–3 years.
- Light use: Seal every 4–5 years.
Proper timing keeps your patio durable and looking great.
Preparation Steps Before Sealing
Sealing starts with preparation—skip it, and you’ll regret it later. (1)
The first step? Cleaning. Sweep the patio thoroughly to clear leaves, dirt, and debris. Then, bring out the pressure washer. It’s a must for blasting away stains, mold, or mildew that might be clinging to the surface. If there’s grime that refuses to budge, apply a paver cleaner for those stubborn areas.
Once it’s clean, check for damage. Cracks? Fill them with polymeric sand or a suitable filler. Loose pavers? Reset them to ensure the patio’s stability. This isn’t just about appearance—proper repairs keep your patio functioning properly.
Finally, let the patio dry completely. A wet surface won’t absorb sealant evenly, which can cause patchy results. Depending on the weather, drying might take anywhere from a few hours to a full day.
Checklist:
- Sweep away debris.
- Pressure wash for a deep clean.
- Repair cracks and loose pavers.
- Allow the patio to dry fully.
Preparation is the backbone of a long-lasting seal.
Choosing the Right Sealer for Your Pavers
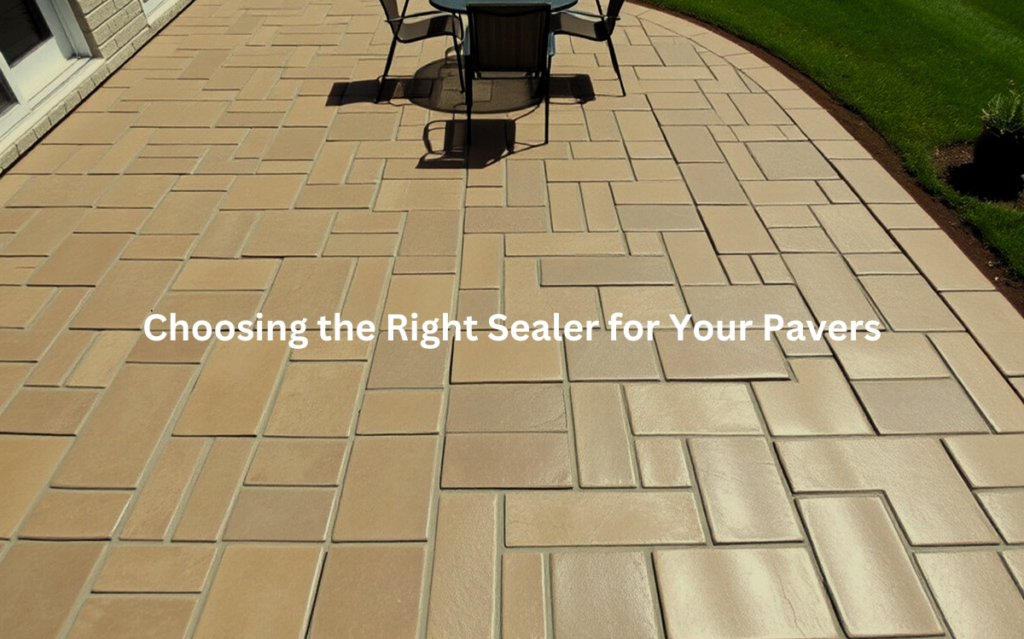
Not all sealers are the same, and picking the right one makes a difference. Sealers generally fall into two categories: topical and penetrating.
- Topical Sealers: These sit on the surface, creating a glossy layer that enhances color and adds a polished look. They’re perfect for concrete pavers but can wear unevenly in high-traffic spots.
- Penetrating Sealers: These soak into the pavers, providing protection while keeping a natural finish. They’re great for porous materials like brick and natural stone.
Your choice should depend on the patio material and how you want it to look. Concrete pavers work well with either type, while brick or stone often look better with penetrating sealers.
Also, consider the weather. In areas with freeze-thaw cycles, penetrating sealers are usually better—they help prevent water from seeping in and causing cracks.
Key factors:
- Material (concrete, brick, stone).
- Desired finish (glossy or natural).
- Weather conditions.
Choose wisely for the best results.
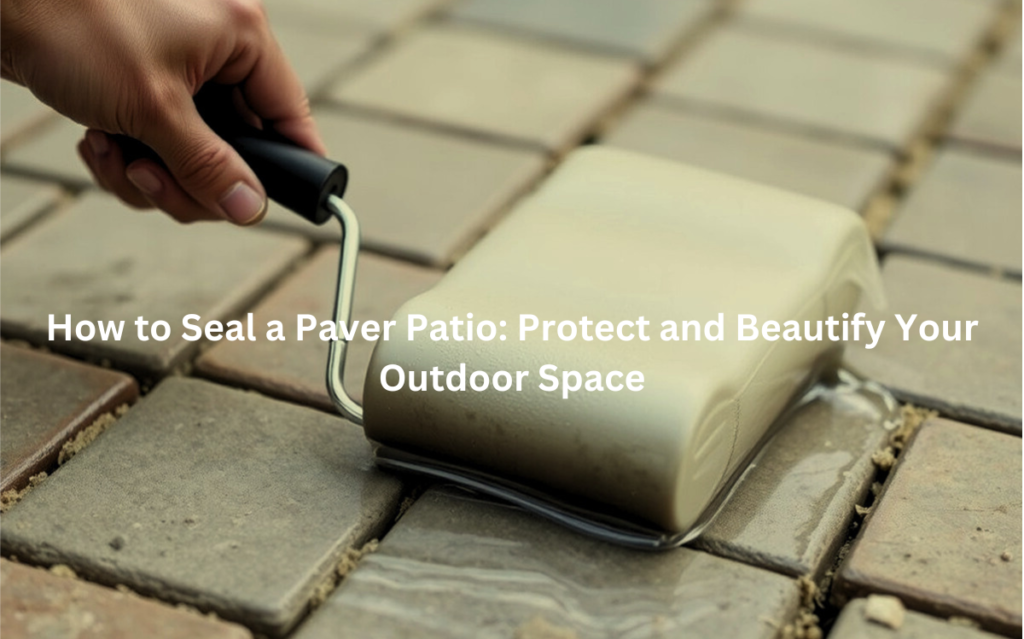
How to Apply Sealer Correctly
Applying sealer isn’t hard, but it does take a bit of care. First, gather your tools: a paint roller (preferably with a long handle), a roller tray, and a brush for edges. Pour the sealer into the tray and work in small sections. Rolling too fast or covering too much area at once can cause puddling, which leads to uneven drying.
Focus on even coverage. Apply the sealer with steady strokes, overlapping slightly as you go. For tricky areas like edges or corners, switch to a brush for precision.
Most sealers need at least two coats for full protection. Check the product’s label for exact drying times between coats—it could range from an hour to several hours. Once you’ve finished, give the patio time to cure. Depending on the sealer, this could take anywhere from 24 to 48 hours before it’s ready for foot traffic.
Quick checklist:
- Use a roller for large areas and a brush for edges.
- Work in small sections to avoid puddling.
- Allow proper drying time between coats.
Patience here pays off with a patio that looks great and lasts.
Post-Sealing Maintenance Tips
Even after sealing, your patio needs regular care to stay in top shape. Sweep it weekly to remove dirt, leaves, or small debris. A quick rinse with a garden hose also helps prevent buildup—just don’t use a pressure washer right after sealing, as it might weaken the sealant.
Keep an eye out for damage. Cracks or loose pavers should be repaired immediately to avoid further issues. Over time, the sealant wears down, especially in areas exposed to heavy foot traffic or harsh weather.
Resealing every 3 to 5 years is ideal. In harsher conditions or high-use patios, it’s worth checking sooner. To know when to reseal, try sprinkling water on the surface. If it soaks in rather than beading up, it’s time for another coat.
Basic maintenance:
- Sweep regularly to keep it clean.
- Rinse occasionally to prevent dirt buildup.
- Inspect and repair any cracks or loose pavers.
A little upkeep ensures your patio stays protected for years.
Common Mistakes to Avoid
Even small mistakes can ruin your sealing job. Here’s what to watch out for:
- Sealing Wet Pavers: Always let the patio dry completely before applying sealer. Moisture trapped under the sealer can cause peeling or discoloration.
- Using the Wrong Sealer: Make sure the sealer matches your pavers. Using the wrong type can lead to poor adhesion or an unnatural finish.
- Over- or Under-Applying: Too much sealer can create a sticky, uneven surface. Too little won’t provide enough protection. Follow the manufacturer’s instructions carefully.
- Ignoring Weather Conditions: Avoid sealing on rainy or extremely hot days. Ideal conditions are dry and mild, with temperatures between 50°F and 90°F.
Advanced Tips for Long-Term Durability
Want to take your patio care to the next level? (2)
Consider these tips:
- Go Eco-Friendly: Look for sealers labeled as low-VOC or eco-friendly. They’re better for the environment and safer for your family.
- Prevent Weeds: After sealing, keep an eye on the joint sand. If it starts to erode, top it up with polymeric sand. This keeps weeds at bay and maintains a smooth surface.
- Protect Against Extreme Weather: In areas with harsh winters, consider using a sealer with added freeze-thaw protection. It helps prevent cracking and damage from ice.
- Add Decorative Touches: Sealing is a great time to think about your patio’s overall look. Add outdoor rugs, potted plants, or string lights to create a cozy, inviting space.
Conclusion
Sealing your paver patio is one of those tasks that pays off in spades. It’s not just about making it look good—it’s about protecting your outdoor space for years to come. With the right preparation, sealer, and maintenance, your patio will stay vibrant, durable, and ready for countless gatherings.
Ready to transform your outdoor space? Contact Lapis Patios today for a free consultation and let their expert team help you create a stunning, long-lasting patio with unmatched craftsmanship!
FAQ
What tools are best for applying a paver sealer to the entire surface?
To apply paver sealer evenly over the entire surface, a nap roller, paint roller, or low-pressure sprayer (like a pump sprayer or bug sprayer) works well. These tools help avoid excess sealer and ensure consistent coverage. For tight corners or edges, a sponge-type roller can provide precise application. Always follow the sealing process instructions for your specific type of sealer to achieve optimal protection.
How can I prevent weed growth in paver joints during the sealing process?
Weed growth can be avoided by filling paver joints with polymeric sand before sealing. This sand hardens when activated with water, creating a solid barrier that discourages weeds. After filling the joints, ensure the paver surface is clean and dry before applying the sealer to lock everything in place and provide a durable, protective barrier.
What’s the best way to clean pavers before sealing to remove stubborn stains?
Start by using a pressure washer to remove dirt particles and buildup of dirt from the paver surface. For stubborn stains like oil stains, use a cleaning solution specifically designed for pavers. Avoid harsh chemicals that could damage the surface. After cleaning, let the pavers dry completely (24-48 hours in dry weather) before beginning the sealing process.
What’s the difference between water-based sealers and solvent-based sealers?
Water-based sealers penetrate the paver surface and provide a natural, matte finish, making them ideal for natural stone pavers and patio pavers. Solvent-based sealers, on the other hand, create a glossy appearance and enhance the color of pavers. Both types of sealers offer excellent protection, but your choice depends on the desired finish and the type of pavers used.
How do I fix uneven pavers before starting the sealing process?
Uneven pavers should be leveled before sealing to prevent future issues. Remove the crooked pavers, adjust the base material or bedding material underneath, and reset them firmly. Use a rubber mallet to ensure the pavers sit evenly. After resetting, refill the joints with polymeric sand and compact the surface to stabilize the pavers.
How much drying time is needed between coats of sealant?
Ample drying time between coats of sealant is crucial for proper adhesion and optimal protection. Most sealers require 24-48 hours of dry time before applying a second coat. Cooler climates or higher humidity might extend this time. Always check the manufacturer’s recommendations for drying time to avoid contact with moisture during the curing process.
How can sealing protect against freeze-thaw damage in colder climates?
Sealing creates a physical barrier that protects pavers from freeze-thaw damage caused by water seeping into the surface and expanding when frozen. Using a quality sealant on non-permeable pavers or concrete pavers adds consistent protection against moisture and damage from chlorides, which are common in colder climates.
Can I use a pressure washer on sealed pavers during regular cleaning?
Yes, but use care in cleaning sealed pavers with a pressure washer. Set the washer to a narrow stream or wide fan spray to avoid damaging the protective barrier. Regular cleaning with a deck brush and clean water is often sufficient for removing amounts of dirt or buildup. Avoid abrasive materials to prevent scratches on the sealer.
What causes discoloration of pavers after sealing, and how can it be prevented?
Discoloration of pavers can result from excess sealer, improper application, or sealing over moisture. To prevent this, ensure the paver surface is dry before sealing, apply thin, even coats, and avoid sealing during wet weather. Using a 2-part polyurethane water-based sealer or a similar quality sealant can reduce the risk of uneven color.
What type of sealer is best for concrete paver patios exposed to constant foot traffic?
For concrete paver patios that experience constant foot traffic, a durable film-forming sealant offers excellent protection against wear and tear. These sealers provide a semi-gloss finish and a protective barrier against dirt and stains. For a more natural look, non-film-forming sealants with deep-down protection are also effective.
References
- https://www.wikihow.com/Seal-Pavers
- https://unilock.com/maintenance/9-tips-for-paver-sealing-success/