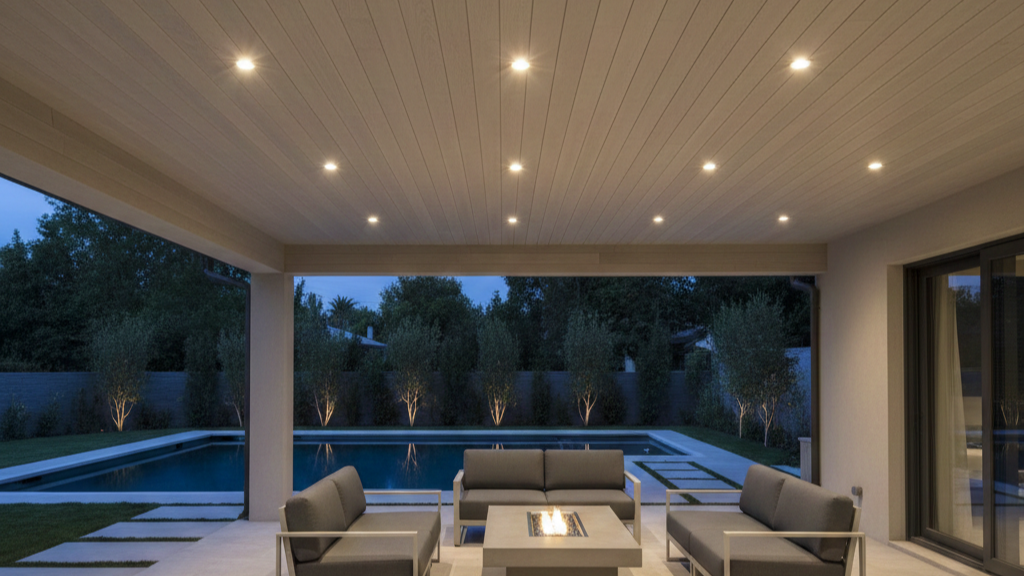
A recessed patio lighting installation that holds up over time, with fewer failures, cleaner lines, and lighting that still looks right years later.
Good recessed patio lighting doesn’t start with a saw, it starts with a plan. You can absolutely install it yourself if you think like a professional and map everything out before touching the ceiling. It’s not just about cutting holes and connecting wires, it’s about choosing the right fixtures, spacing them correctly, and making sure every switch and dimmer feels natural to use.
This guide walks you through strategic layout, the right materials, permits and safety, and a step-by-step workflow to get it done safely and correctly. Read on to make your Charlotte evenings brighter and your home more inviting.
Key Takeaways
- Plan your layout with a tape measure and a template first, not a drill.
- Use only wet-rated or damp-rated fixtures and wire to handle our Carolina weather.
- Always connect the right wires and ground everything for a safe, code-compliant installation.
Strategic Layout That Feels Effortless
The best recessed patio lighting looks like it just belongs there, even though you planned every inch, a mindset rooted in solid patio lighting design principles rather than fixture placement alone. A good layout is almost invisible, it quietly makes the space feel balanced and calm. You want even coverage across seating, dining, and walkways, with no harsh bright spots or dark pockets.
Use this simple starting rule: space fixtures at about half the ceiling height. With an 8-foot soffit, that means roughly 4 feet between lights. It’s not a rigid rule, but it gets you very close. Before you cut anything, grab:
- Tape measure to map spacing
- Painter’s tape to mark each fixture
- Pencil for quick layout tweaks
Then, walk the patio and look at the marks from different angles. Adjust until it feels natural, not forced.
Keep a few layout habits in mind:
- Set lights 1.5–3 feet from walls for a soft wash
- Don’t place fixtures directly under ceiling fans (no strobing)
- Use the fixture’s template for perfectly consistent cutouts
Spacing, Joists, and Beam Angles
Once your layout looks good, reality steps in: joists. Your ideal mark doesn’t work if there’s a beam sitting right behind it. Use a stud finder and scan along every taped mark. If you hit a joist, don’t fight the framing. Just shift the light a few inches along the same line so the pattern still reads clean and intentional. Small layout moves now prevent ugly patches later.
Next comes beam angle, which sounds technical but isn’t. It’s just how wide the light spreads. For general patio lighting, you’re aiming for a wide, soft glow, not a tight spotlight.
Use these simple guidelines:
- 60° beam angle or wider for ambient patio lighting
- Around 40° for accent or spotlight use
- Wide beams help blend light and cut down harsh shadows
A 60-degree beam creates wide, overlapping pools of light that keep the whole patio feeling even and welcoming, the same philosophy behind effective ambient landscape lighting ideas that prioritize mood over drama.[1]
Required Tools and Weather-Rated Materials
Getting ready for recessed patio lighting feels a bit like packing for a careful mission. The work goes smoother when every tool is within reach, and the materials are actually meant to live outside. Indoor-rated parts on a Charlotte patio won’t last long once the first real storm rolls through.
Don’t skip, guess, or substitute. Each item on this list does a specific job.
| Tools | Materials |
| Drill & Hole Saw (size per fixture) | Wet-Rated or Damp-Rated Recessed LED Fixtures |
| Non-Contact Voltage Tester | 14/2 NM-B Outdoor Electrical Wire |
| Wire Strippers & Cutters | Weatherproof Wire Connectors (wire nuts) |
| Insulated Screwdrivers | Weatherproof Junction Boxes (if needed) |
| Tape Measure & Pencil | Manufacturer’s Trim Kits |
| Ladder | Exterior-rated Caulk |
| Safety Glasses & Dust Mask |
A quick checklist run-through before you start saves you from three ladder trips and a hardware store run.
Keep these priorities in mind:
- Voltage tester confirms power is truly off
- Insulated tools add a layer of safety if you slip
- Hole saw gives clean, repeatable cutouts for snug trims
- Wet-rated fixtures are usually the safer call for most Charlotte patios, especially where wind can push rain into the soffit
Phase 1: Power, Planning, and Precise Cutting
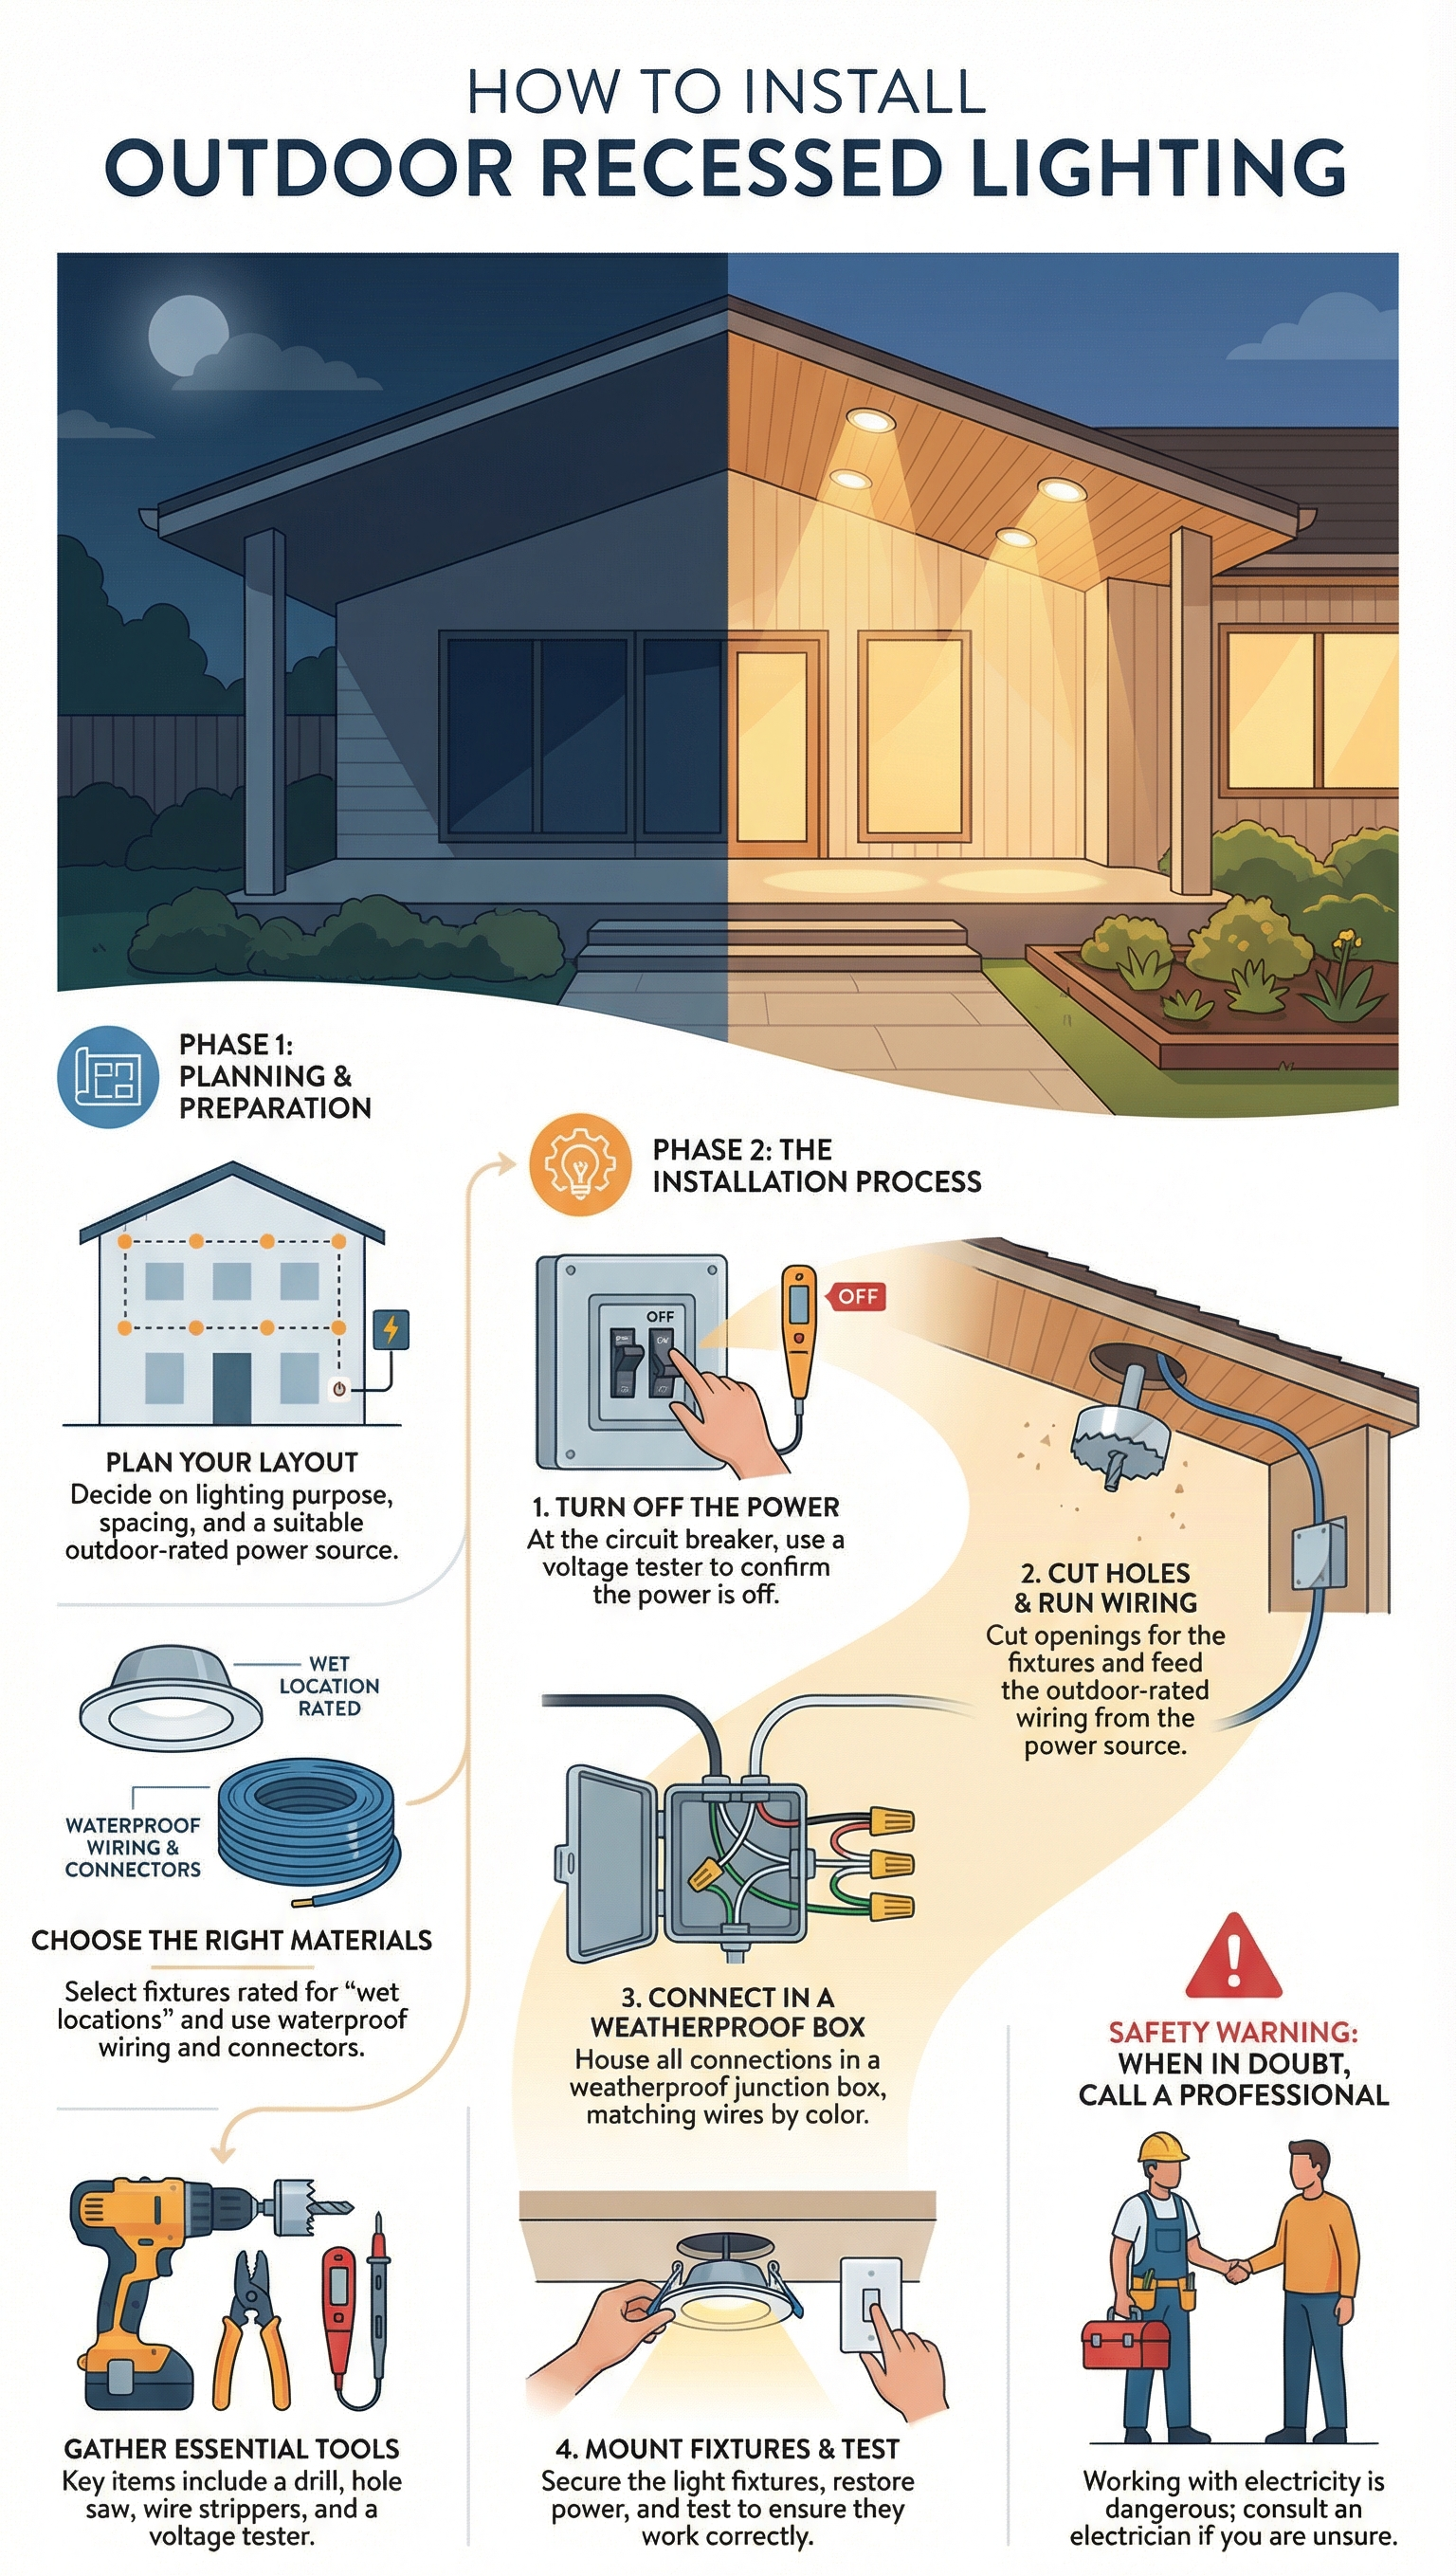
Start with safety, every single time.
- Go to your main breaker panel and shut off the circuit that feeds your patio or soffit area.
- Use a voltage tester on every wire you’ll touch, not just one, to confirm they’re actually dead.
Once the power is confirmed off, move into layout and cutting. Mark your light locations using the manufacturer’s spacing guidelines or your own lighting plan. Then:
- Hold the template flat and centered on your pencil mark.
- Trace the outline slowly so the circle doesn’t wander.
- Fit the correct size hole saw into your drill, start at a slight angle to score a shallow groove, then straighten the drill and let the saw teeth work through the soffit.
Don’t rush the cut. Slow, steady pressure avoids splintering wood or cracking vinyl. When the plug drops, dry-fit the light trim in the opening. It should sit snug, not loose, not forced. That little test saves you from headaches later.
Phase 2: Cable, Connections, Mounting, and Sealing
Credits: Workin’ with Wolkon
Once the holes are clean, the real “guts” work begins. Run your 14/2 outdoor-rated cable from the power source (switch or existing junction box) to each light opening, keeping the cable:
- Supported with staples every few feet.
- Away from sharp edges.
- Routed in a clean, readable path for the next person who opens it.
At each light, strip the jacket and you’ll see black, white, and bare copper (or green). Inside the light’s junction box, you’ll see the same set. Match them:
- Black to black (hot)
- White to white (neutral)
- Bare/green to ground screw or ground wire
Twist wire ends clockwise with pliers, cap with weatherproof connectors, then tug gently to confirm they’re tight. Fold the wires neatly into the box. For wafer LEDs, push the box into the hole and snap the trim into place. For cans, mount the housing first, then add trim. Finish with a bead of exterior caulk around the trim edge to block water, restore power at the breaker, and test each light.
Safety Protocols and Electrical Compliance
Working with electricity isn’t about being brave, it’s about being careful. The National Electrical Code (NEC) is basically a long record of what went wrong for other people so you don’t repeat it. For outdoor recessed lights, look closely at:
- NEC Article 410 for rules on fixtures in damp and wet locations.
- The fixture rating on the box (damp-rated or wet-rated, clearly printed).
Placement matters just as much as the label. You should:
- Keep the fixture housing at least 8 inches from any ceiling joist to limit heat buildup.[2]
- Use IC-rated fixtures if the soffit is insulated, or build a proper barrier to keep insulation away from non-IC housings.
- Avoid any location where water could collect inside the trim or housing.
These aren’t random hurdles. They’re the guardrails that keep your project from turning into a future hazard or a constant worry.
Enhancing Functionality with Smart Control
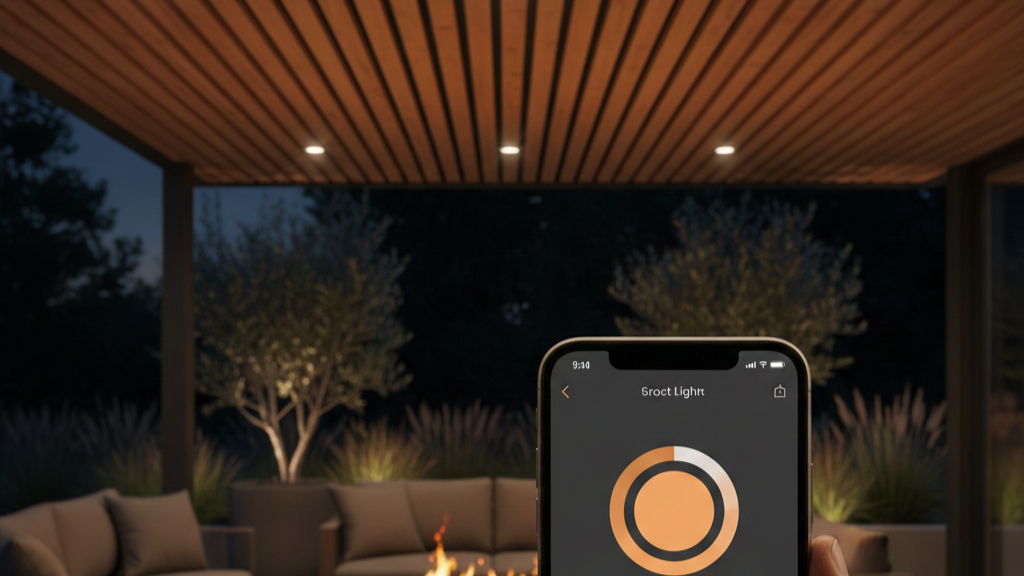
Once the lights are wired and shining, you’ve solved the core problem: visibility. But function isn’t the ceiling here, it’s the floor. Smart controls let you tune how the space actually feels and works day to day. Instead of relying on a basic on/off switch, you can:
- Install a smart dimmer switch that works with your existing LED fixtures.
- Use smart bulbs (if the fixtures accept standard lamps) tied into an app or smart home hub.
From there, the patio becomes programmable:
- Set dusk-to-dawn automation so the lights track sunset and sunrise.
- Create routines for dinner, late-night reading, or weekend gatherings.
- Adjust brightness from your phone when you’re already seated and don’t want to get up.
For patios that connect to yards or side entrances, pairing recessed lights with thoughtful lighting for garden paths and walkways ensures movement stays safe and intuitive long after sunset.
FAQ
What are senior dev responsibilities beyond coding day-to-day?
A senior software developer handles senior dev responsibilities beyond writing code. The role includes technical leadership, system architecture design, and architectural decisions across the software development lifecycle.
You guide the code review process, ensure code quality assurance, and support agile methodology senior teams. Many also oversee DevOps practices advanced, scalability best practices, and software project management.
How do senior developer pros and cons affect work-life balance?
Senior developer pros include higher pay, influence, and job security seniors. Senior developer cons include a high-pressure environment, tighter deadline adherence senior demands, and burnout prevention senior challenges.
Layoff risks developers still exist, even with experience. Many seniors focus on time management senior skills and work-life balance dev habits to reduce long-term stress.
Which technical skills matter most for a lead developer today?
A lead developer needs strong full stack senior skills, from frontend backend lead work to API development senior tasks. Common areas include JavaScript expertise senior, python senior developer, java senior dev, and SQL advanced queries.
Cloud architecture senior knowledge, CI/CD pipelines senior, unit testing mastery, security best practices code, and performance optimization are also important.
How does a software engineer career move from mid level to senior level?
Career progression dev usually moves from mid level to senior through impact, not titles. Hiring teams look for problem solving complex skills, mentoring juniors, and system design interview readiness.
Strong resume senior developer examples, GitHub senior dev projects, and open source contributions help. Network building devs and clear communication skills tech also improve chances.
What risks do seniors manage during large software projects?
Senior developers manage risk management dev issues like budget constraints software, estimation accuracy projects, and stakeholder communication. They work with cross functional teams, guide feasibility studies software, and protect deadline adherence senior goals.
When incidents occur, seniors lead root cause analysis, incident response lead actions, and maintain steady team collaboration.
Final Thoughts on Patio Lighting
A well-lit patio extends your home. It turns an unused space into an evening destination for coffee, conversation, or quiet. The installation, when done with care and the right materials, fades into the background. What remains is the effect, the warm glow that makes the space feel intentional and alive.
If you’re planning and want it done right the first time, a trusted local installer can make all the difference. You followed a plan, you used the right parts, you connected the wires correctly. Now, go flip the switch and enjoy the room you just built at Lapis Patio.
References
- https://inspectapedia.com/BestPractices/Light_Fixture_Spacing.php
- https://www.mikeholt.com/documents/technical/2009_White_Book_Final.pdf